If you would like to work with ISO images From your favorite distribution, we have created this guide for you. With it you will know everything you need to start working with these types of files in a simple way. Especially for those who come from other operating systems such as Windows, where they had a series of software to be able to mount this type of images or burn them on optical discs (CDs, DVDs, BD, ...), but they have found that said programs are not available on GNU / Linux.
The truth is that ISO images are quite good to work with and store large amounts of information. That is why they have become the preferred format for the vast majority of software vendors. Microsoft itself allows you to download ISO images of its latest operating systems, and of course all the official websites of distro projects also allow ISO images to be downloaded from their download areas.
What is an ISO?
An ISO image is a file for storing an exact copy of a file system under the ISO 9660 standard who has given him his name. In addition, being a compact package, it has also become the ideal format for storing content intended to be burned on optical media or removable drives, as well as for making backup copies with some backup programs.
The extension most popular is the .iso, but they can also appear with the extension .img as can be seen in some images of operating systems for the Raspberry Pi, etc. This difference in length does not mean that they are not images of the same format, it is simply a different convention. Although .iso is the most popular, we can also find separate extensions such as .cue and .bin, which store the data (BIN) on the one hand and a description of said data (CUE) on the other.
That being said, many software developersBurning software especially, have tried to create their own image formats to pretend to replace ISO, but they have certainly failed. This is the case of Nero Burning ROM Ahead, which created the NRG format, or Adaptec CIF for its Easy CD Creator, CCD for the CloneCD project, MDF for Alcohol 120%, etc.
How to create an ISO
For create ISO images from our GNU / Linux distro We have a multitude of graphic programs to do it, such as Furious ISO, ISO Master, Brasero, Simple Burn, K3b, Acetone ISO, etc. But we are going to teach you to do it in a more powerful way and without wasting so many resources, and that means doing it from the console with the simple all-powerful dd tool that you probably already have installed in your distribution, since it usually comes by default ...
Well, imagine what we want create a copy of a directory in our distribution, for example the / home / user that we are going to pass to ISO. For this we can enter the following commands:
dd if=/home/usuario of=/home/imagenesiso/usuario_personal.iso
Another option for "Isar" a directory is to use another tool like mkisofs:
mkisofs -o /home/usuario/imagen.iso /home/usuario/contenido
Instead, if you want to create the image dumping the contents of a DVD or CD, we can use this other alternative:
dd if=/dev/cdrom of=/home/usuario/imagen.iso
This way we can create images of directories and also of other storage media. Remember that the dd command It supports any device or input medium if you change the path of if =, while for the destination where you want to store the image, you just need to modify the path of of =.
How to mount an ISO

With some of the programs mentioned above we can mount ISO images to access the content graphically and easily. What's more, there are also tools like mkisofs with which we can mount our ISO image in any directory to be able to access the content without having to burn it on an optical medium. For example, on Windows, perhaps the best known tool for this is Alcohol 120% or Daemon Tools, but these tools are not available for Linux. So what? Well, we can always pull the alternatives for these apps like Furious ISO or AcetoneISO that have easy-to-use graphical interfaces. But if we want to use the options that Linux gives us natively:
sudo mkdir /media/iso

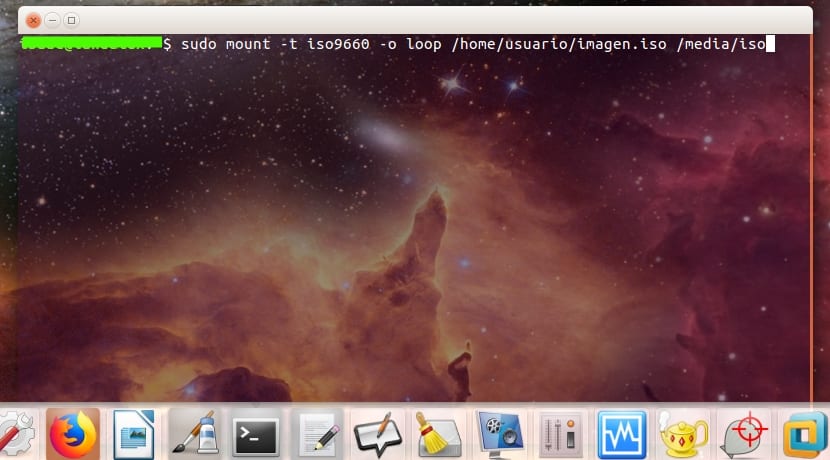
sudo mount -t iso9660 -o loop /home/usuario/imagen.iso /media/iso

sudo umount /media/iso
As we can see, we create a directory where we are going to mount the ISO image that we have called iso and we have placed inside the / media directory. Then we mount the ISO image in said directory and we can have access to content. Once we no longer want said content, it can be unmounted with umount as we can see ... By the way, with the -t option of mount we have given it a format that in this case is ISO 9660 and with -o we tell it to use our loop device. With this we are using a virtual device called loop device that will help us to mount the ISO in any directory, allowing access to its content.
How to burn an ISO

Now, if what we want is burn or burn said ISO image to optical mediaWhether it is a CD, DVD, HD-DVD or BluRay, we can also choose the programs with a graphical interface that we have mentioned above or directly resort to the console and do it through commands. There are some tools in text mode for this, such as wodim, cdrskin, xorriso. If we already have them installed, we can use them with the following commands:
wodim -v dev=/dev/cdrom -dao /home/usuario/imagen.iso

cdrskin -v dev=/dev/cdrom -dao /home/usuario/imagen.iso

xorriso -as cdrecord -v dev=/dev/cdrom -dao /home/usuario/imagen.iso
By the way, remember that in some cases the optical device in your distribution (although it is rare) may not be called / dev / cdrom, but take other names such as / dev / dvdrom, or / dev / sr0, etc.
I hope it has been helpful for you. Do not forget leave your comments...
Not on others but Ubuntu is as easy as right clicking on the ISO and mounting, then unmounting. Record the same, open with X program, recording and voila. They scare the newbies
Abounding in the use of graphical environments
Brazier
K3b
Gnome CD Master
gnome baker
xfburn
Free ISO Creator
ISO Master
Image montages
Furius ISO mount
CDemu
ToastMount
gmount
And some more should be, at the very least, cited
the article seems written to scare away potential future linux users
Hahaha it's true, but look at how times have changed: until about five years ago this type of tutorials were the daily bread and among the same community, those who did not publish in such a way were bullied. It was common to make people believe that doing things from the terminal was the most "simple" method, and indeed for anyone who was a programmer or an advanced expert in the matter, they would say yes, but for us on foot, it was not so simple.
As a respectful recommendation to Don Isaac, it would be very good that in future publications of this section the user was taught in two ways: by terminal and by graphical environment, choosing an application. Thank you very much for the post and for dedicating your time to us.