In previous articles we had seen how manage repositories Ubuntu using the Software and Updates tool. Now let's see as it is done using the terminal. The use of the terminal is not only faster but also allows us to easily detect if errors occur.
Like all Debian-derived distributions, Ubuntu uses a number of tools to get, install, update, and uninstall programs.. Two of them are dpkg and Apt. Basically Apt acts as an interpreter between us and dpkg managing the list of packages available in the repositories, determining the necessary dependencies and choosing the repository from which they should be downloaded.. Once this is done, dpkg takes care of the installation.
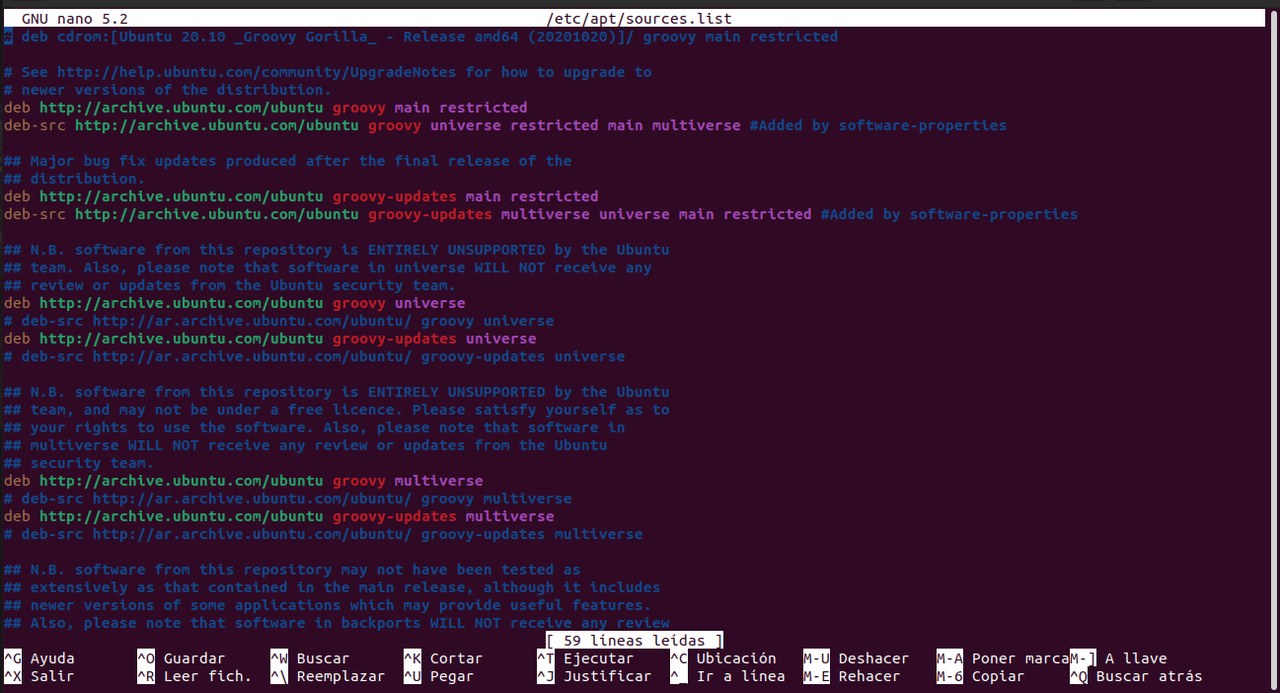
Working with repositories from the Ubuntu terminal
We can see the main Ubuntu repositories list by typing
sudo nano /etc/apt/sources.list
The first thing we must do is a copy to avoid problems with any modification.
It can be done with this command
sudo cp /etc/apt/sources.list /etc/apt/sources.list.copia
If you look at the list you will see that there are repositories that start with #. Deleting that symbol will make that repository become active. On the contrary, if you add the symbol # that repository will be deactivated.
Typically, repositories appear this way
deb http://archive.ubuntu.com/ubuntu groovy main restricted
o
deb-src http://archive.ubuntu.com/ubuntu groovy universe restricted main multiverse
Where:
- deb: Indicates a repository of previously compiled packages.
- deb-src: It is a repository of program source code.
- http://archive.ubuntu.com/ubuntu: Es el identificador uniforme de recursos (por sus siglas en inglés). Es el link de acceso al servidor donde está el repositorio.
- groovy: Indicates the version of the operating system.
- universe restricted main multiverse: Indicates the type of repository.
For any changes we make to the repositories to work, we must first save the list by pressing
CTRL + O
y
CTRL + X
And in the terminal write
sudo apt update
Adding repositories
There are two ways to add repositories. The first is to open the list with the command
sudo nano /etc/apt/sources.list
Go down to the end of the list and there paste the repository and then save it by pressing
CTRL + O
y
CTRL + X
Next we update the list with
sudo apt update
An easier way to add a repository is by using the command
sudo add-apt-repository
For example, if we want to add the Wine repository that we used as an example in the previous article
sudo add-apt-repository 'deb https://dl.winehq.org/wine-builds/ubuntu/ groovy main'

sudo apt update
The command sudo add-apt-repository also used for personal archive packages. For example to add Krita's ppa repository, we write:
sudo add-apt-repository ppa:kritalime/ppa

sudo apt update
In case you load the list of repositories you can recover it with these two commands
sudo rm /etc/apt/sources.list

sudo mv /etc/apt/sources.list.copia /etc/apt/sources.list
You can also generate a list from this page.
Different ways of doing the same
Some outdated tutorials still use the apt-get command instead of the apt command that we use in the example. At the moment it continues working although the use of apt is recommended. Anyway this is the equivalence.
sudo apt update replaces sudo apt-get update to update the list of repositories
Some tutorials use a different way to add the repositories. Take for example the case of the Brave browser. The following method is recommended on its website.
sudo apt install apt-transport-https curl gnupg
curl -s https://brave-browser-apt-release.s3.brave.com/brave-core.asc | sudo apt-key --keyring /etc/apt/trusted.gpg.d/brave-browser-release.gpg add -
echo "deb [arch=amd64] https://brave-browser-apt-release.s3.brave.com/ stable main" | sudo tee /etc/apt/sources.list.d/brave-browser-release.list
sudo apt update
sudo apt install brave-browser
With the first line
sudo apt install apt-transport-https curl gnupg
Some programs are downloadedI know what we will need to do the installation
On the second line
curl -s https://brave-browser-apt-release.s3.brave.com/brave-core.asc | sudo apt-key --keyring /etc/apt/trusted.gpg.d/brave-browser-release.gpg add -
The verification key is downloaded and savedrepository authenticity number.
The one that interests us is the third
echo "deb [arch=amd64] https://brave-browser-apt-release.s3.brave.com/ stable main" | sudo tee /etc/apt/sources.list.d/brave-browser-release.list
In this case the repository is not saved in the sources.list. a different file is created called brief-browser-release.list and in it the repository is written that will tell the package manager where to install from.
The last two lines update the list of repositories and install the program.