
To install Ubuntu from a USB device, a 4 gigabyte is enough. However, those with greater capacity allow hosting several distributions
Gone are the days when computers came with floppy drives and recorders for CDs and DVDs. Today, solid-state devices are fighting for the place of the classic hard drive and, USB devices also known as pen drives are the main means of exchanging files in physical form.
In this tutorial we are going to see how to install Ubuntu from a USB device. Let's clarify that once the device is connected and the system is booted, the installation is exactly the same as doing it from a DVD. The difference is in the way the installation media is created and the need to configure the boot preferences of the computer. Since this varies by motherboard model, I can't give a general instruction on how to do it.
Some readers are likely to miss Rufus on this list. Rufus is undoubtedly the most complete solution for creating distribution installation media. Unfortunately it is only available for Windows and I decided to focus on cross-platform tools.
Origin and destination
If you paid attention to language classes at school you will remember the importance of prepositions. Two of them were 'since' and 'in'. Unlike what happens with Windows we can install Ubuntu from a pendrive and we can install it (provided it has enough memory) on a pendrive. In the first the USB device is the installation medium, in the second it is the installation destination.
When you connect a USB device to use as Ubuntu installation media, gives you the option to use the so-called Live Mode in which you have an experience similar to using it normally except that RAM memory is used as a hard disk and the changes are lost when you turn off the computer. Some installation media creation tools give you the ability to allocate a space on the device (so-called persistence) to save the changes you make. Those changes are loaded into RAM after the operating system loads. This is a very useful feature for creating custom installation media.
When you install Ubuntu on a USB stick the experience is the same as installing it on the main drive. The only limitation is space.
How to install Ubuntu from a USB device
Previous steps
A recommendation born from my more than fifteen years creating installation media for Linux distributions. If you are going to create it from Windows, use its format tool with the device first, it does not matter that the tool you are going to use has the format option. You'll save yourself headaches.
The procedure is the next:
- Connect the device USB that you will use as installation media.
- Open Explorer of Windows.
- press in the This Computer section.
- Put the pointer on the icon that identifies the pendrive and with the right button click on Format.
- Select exFat as file system.
- do not check quick format box.
- press en Start.
- press en OK.
When the formatting is done you are ready to create the installation media.
On Linux you can do it graphically, although the tools vary by desktop. You can also do it from the terminal by following these steps:
- Identifies the device with the command
sudo fdisk -l. The identifier will be /dev/sdX1 where the X is replaced by a lowercase letter of the alphabet. - Unmount device con the command
sudo umount /dev/sdX1 - Format the device with s
udo mkdosfs -F 32 -I /dev/sdX1 - Disconnect and reconnect the device.
Again, there are ways to do this graphically, but every desktop implements it differently.
The second step is to get the Ubuntu image. You can download it from this page.
Tools for creating installation media
Once you finished downloading the image, you need a tool to create the installation media. These are some of the options:
windy
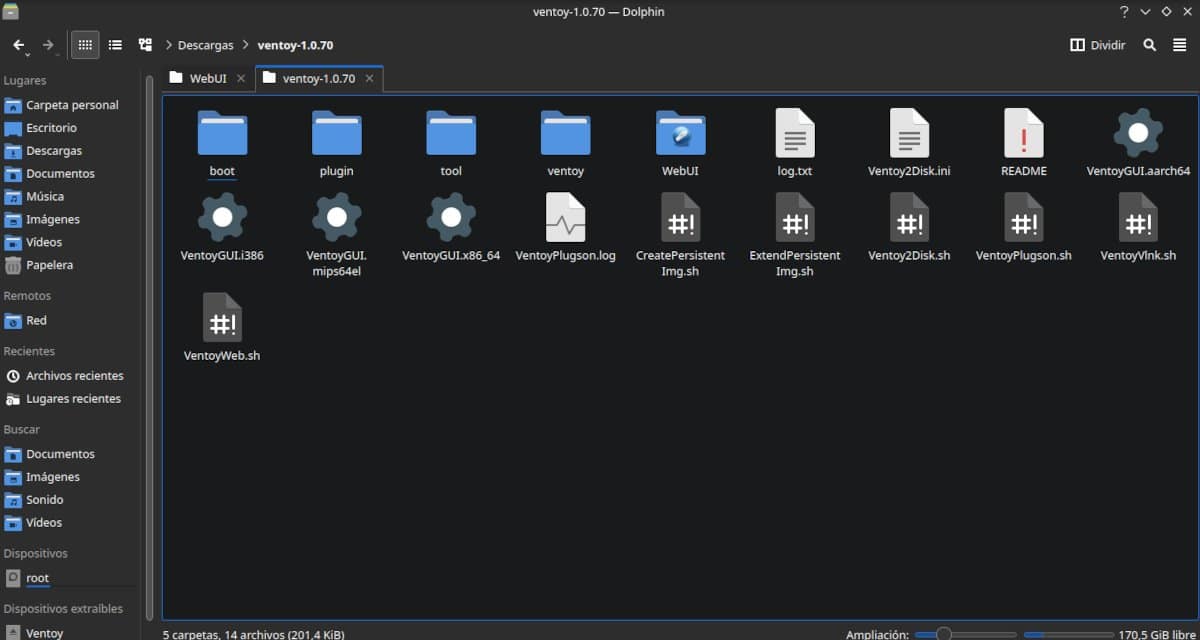
The Linux version of Ventoy has several graphic utilities, for the terminal and web.
windy It is available for both Windows and Linux and is the option to consider if you've never created installation media for a Linux distribution or don't want to complicate your life. You only need to run the application, follow the steps indicated to install the program on the device and then, using the file manager, drag the image you downloaded to the pen drive.
You can install as many images of Linux and Windows distributions as the capacity of the flash drive. When you start the computer with the device connected you will have a menu to choose which one to start. Remember that Windows does not have live mode so the installer will start.
Having Ventoy installed does not mean invalidating the flash drive for other uses. Since it takes up very little space, you only have to delete the iso images, save the documents you want and re-record the images when you need it.
The characteristics of Ventoy are:
- Support for UEFI and Legacy Bios.
- Supports persistence.
- Compatible with Windows images and Linux distributions.
- Update to a new version without formatting.
- It can be used with images larger than 4 gigabytes.
Creating the installation medium with Ventoy
- double click in Ventoy.exe on Windows or as appropriate in VentoyGUI.aarch64, VentoyGUI.i386, VentoyGUI.mips64el or VentoyGUI.x86_64 on Linux.
- Translate the app clicking on Language and choosing Spanish from the drop-down list.
- Select the following under Options Secure boot support and in Partition style GPT (Only in case it is a relatively new computer. Otherwise, leave everything as it is.
- Select the correct device in the dropdown list under device. Do not do as I did while preparing the article I made a mistake and deleted my collection of electronic books.
- Click on install.
- Press ok in each of the notices.
- Go to file manager and copy the Ubuntu image to Ventoy.
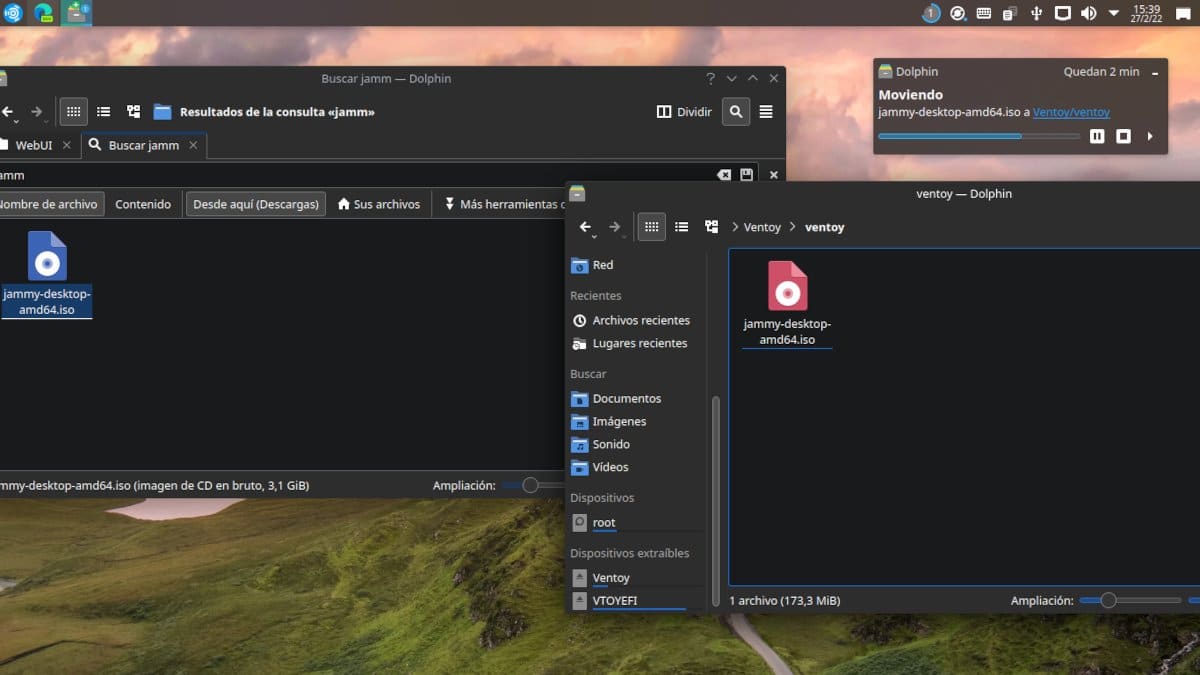
To create an installation medium using Ventoy, you just have to copy the image to the device.
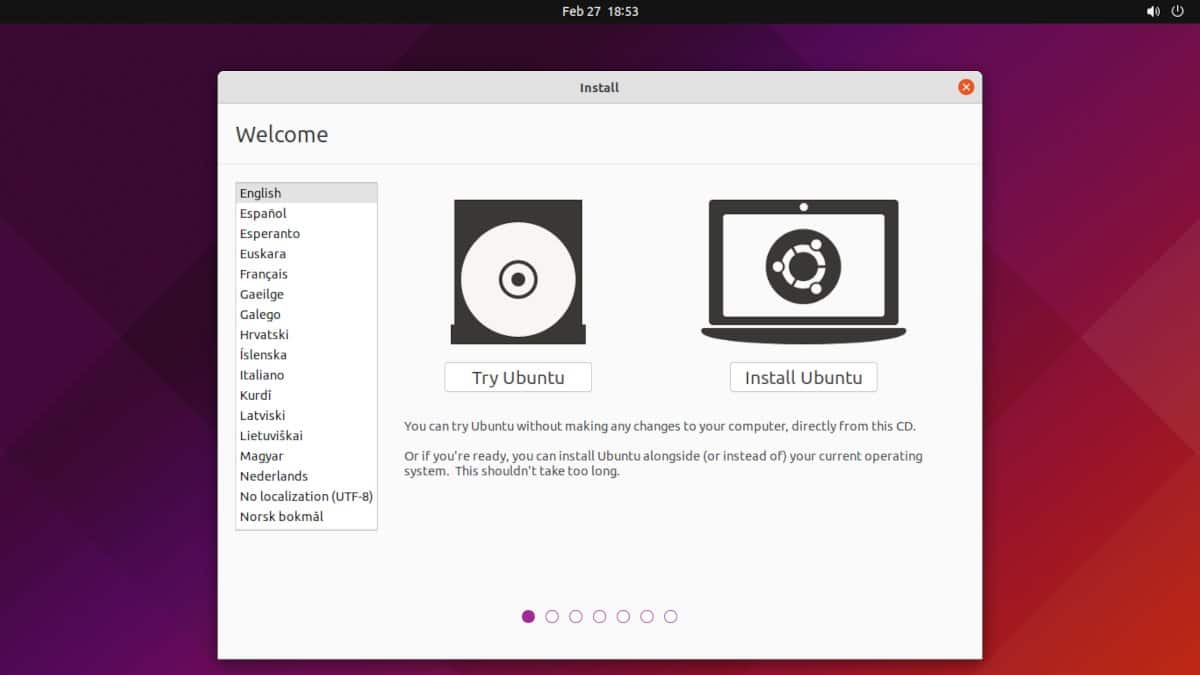
In principle you can already boot with the Ubuntu installation. You just need to restart the system and configure the boot of your computer. Unfortunately the simplicity of Ventoy ended here. If you want to activate persistence, you will have to follow a few more steps that we are not going to mention because there are tools that do it more easily. You can find how to do it in the documentation.
UNetbootin
While on installation media created by most tools, Ubuntu boots to the install/test option screen, when created with UNetbootin we go directly into test mode.
This program It is available for Windows, macOS and Linux. On Linux you can install it using the executable binaries which need to be launched from the terminal with the command sudo ./nombre del archivo descargado. You may be prompted to install additional packages.
An interesting feature of UNetbootin is that allows you to download the distribution before installing it, although it is not always the most current version, so it is better to obtain it from the official page.
Please note that this app do not format the device so you must do it beforehand.
The procedure for creating the installation media is as follows:
- Select image downloaded in the section Disc/image.
- fill in the size of persistence. 1024 should be more than enough.
- press en OK.
At some point during the extraction and copying of files, the program seems to stop. It is not like this. CuI'm done, click on Logout and reboot the system. Remember to set the computer's boot order.
As I say in the caption of the photo that illustrates this section, UNetbootin goes directly into test mode and does it in English. Thanks to the fact that we have persistence activated we can modify this and, thanks to persistence, the change will be permanent. In any case, if you are only going to install Ubuntu on the disk, start the translator and select Spanish as the language.
Whale Etcher
Other tool simple and what In addition to creating an installation medium using a pendrive, you can do it with SD cards.. It is available for Windows (32 and 64 bits), macOS and Linux (also 32 and 64 bits). In the case of the main Linux distributions it is possible to add the repositories to keep the application updated. Other options are packages in DEB, RPM, and Appimage formats.
Balena Etcher too allows us to download an image before installing it, but, unlike UNetbootin, it does it directly from the link that we indicate. It has to be the download link for the app, not the website. In addition, we can use a previously downloaded image or clone a disk.
Once the origin is selected, we determine the destination. If there is more than one USB device connected, we select the correct one from a list. To start the procedure, click on Flash!.
Once we authorize it with our password, the recording will begin. The screen that shows us the progress is confusing since much of it includes advertising for other projects from the developers. The only visible indicator is a colored bar in the middle and on the left.
When it's done, we reboot and adjust the boot order of the devices.
Which is the best of the three?
Depends. If you don't know Ubuntu, or you want several distributions on your device, the best option is Ventoy. If you want to create an installation media configured to your liking, UNetbootin. If you are going to create the installation media on a Balena Etcher SD card.
Anyway, these are just three of the dozen tools available to create Ubuntu installation media with a USB stick.