
Artificial intelligence is advancing by leaps and bounds. It is becoming more and more powerful and allows you to apply yourself to new tasks. The automatic learning It is one of the fields of AI that you should pay special attention to, with projects like TensorFlow. If you have a server or cloud hosting, you can install this project there to give it the ability to learn without the need to explicitly program.
In this tutorial I will show, step by step, how you can install this powerful open source project in a cloud hosting. For this, I have chosen Clouding as a reference, for its prices, ease, 24/7 support in Spanish, availability, benefits and, especially, for having its data center in Spanish territory, in Barcelona. Therefore, it will be under European data protection laws ...
¿How can Tensorflow help my business?

In the pandemic, it has become much more apparent that companies need to modernize to be competitive. Much of the European aid will be directed precisely to this digital transition. All businesses that have not adapted have suffered more from the economic consequences of this health crisis. For example, even small businesses have been quick to switch from their physical sales to online sales, allowing them to continue operating without being affected by the restrictions.
Technologies such as the cloud, the IoT, or AI, are essential. Specific, with TensorFlow and machine learning, you can get great benefits. To cite just a few examples:
- Improve images using AI if you are dedicated to design or photography.
- Assist with medical diagnosis by analyzing the results of medical tests.
- Agile image processing and automated cataloging.
- Teach you voice or sound recognition.
- Facial analysis, feelings, etc.
- Automated fault detection.
- Detection of languages in texts automatically.
- Streamline a multitude of daily business tasks.
- And a long etc. The applications are almost unimaginable ...
Therefore, it is widely used in industry, in sectors such as the automobile, also in the health sector, in insurance, tax agencies, and many other professionals.
What is TensorFlow?
![]()
TensorFlow is open source software, initially developed by Google engineers and researchers, and later released. A library for numerical computing and machine learning. It uses data flow graphs for this, the nodes represent mathematical operations, while the edges represent multidimensional data matrices (tensors) communicated between them.
With this software you can build and train artificial neural networks to perform multiple tasks, such as detecting and deciphering patterns and correlations, in a way analogous to the way humans learn and reason.
This project also provides a lot of flexibility, being able to carry out the calculations using CPU or GPU, both one and several of them, on PCs, servers and even mobile devices. This is possible since it is cross-platform, being able to run on systems such as GNU / Linux, macOS, Windows, iOS and Android, as well as a web service as we will see in this tutorial. It even has several wrappers to use different programming languages: Python, C ++, or Java. All with a single API.
Install TensorFlow Step by Step
The next thing is to show a step by step example of how install TensorFlow en a cloud hosting. To do this, I will use a VPS of Clouding.io, where you can choose both Windows and Linux operating systems. Of course, given the theme of the blog and the benefits of GNU / Linux, there is no doubt that I will be based on a Linux distro.
Create the account and prepare the Clouding platform
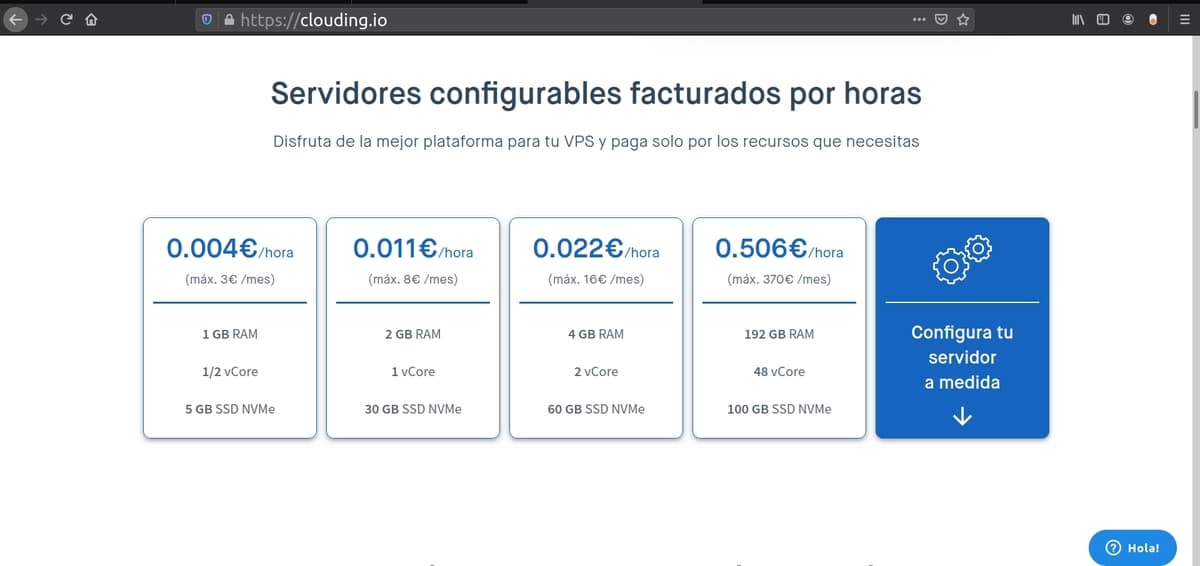
Before starting, you must register to gain access to the service offered by this provider and thus enjoy € 5 free credit they offer to test the platform. It will be as simple as following the steps indicated for the verification of the account. Only takes a minute.
Afterwards, you must return to the official website of Clouding and log in entering your username and password:

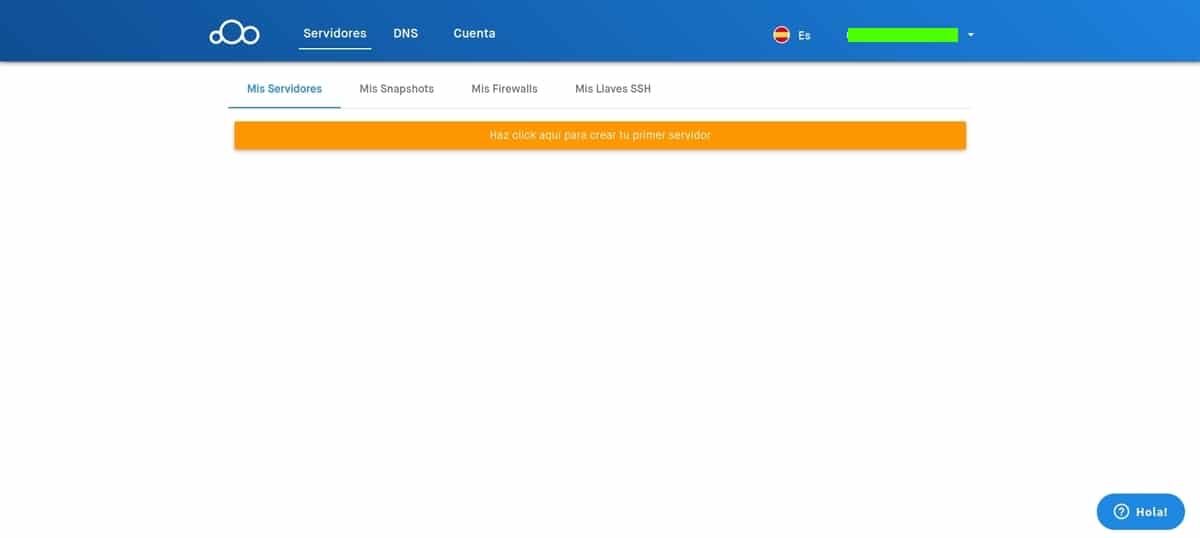
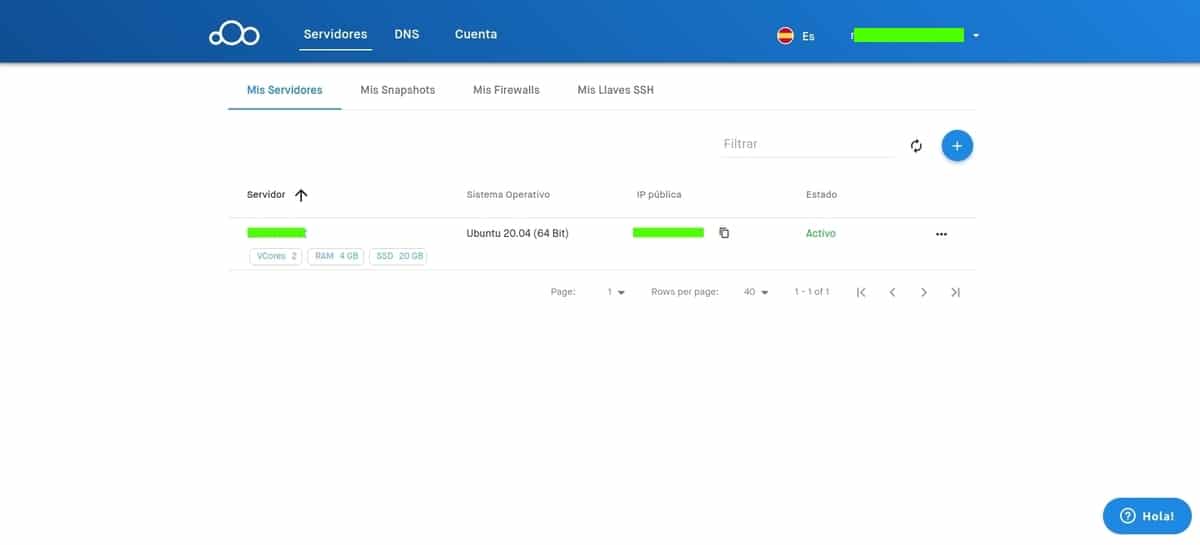
Now you can see the Clouding control panel, which, as you will see, is quite simple and intuitive to use. Even without too much knowledge you can handle it without problem by following this tutorial. To start create an instance for TensorFlow, press Click here to create your first server:
That will take you to the menu of configuration of your server. The first thing will be to name your VPS, you can choose the one you prefer. Then you have to choose the OS. For this tutorial I will select one of the distros that they offer (CentOS, Ubuntu Server, Ubuntu Desktop or Debian). You can choose the one you prefer, in my case I will choose an Ubuntu Server 20.04:

After selecting the base system, the following is configure the rest of the parameters that appear on that same page below. As you can see, among the configuration options of the machines you can choose the amount of RAM, vCPU cores, or the SSD storage space you need. For TensorFlow itself you will not need much, but it may be that for the rest of the data that you have to handle yes, therefore, think well what you need (however, it can be scaled):
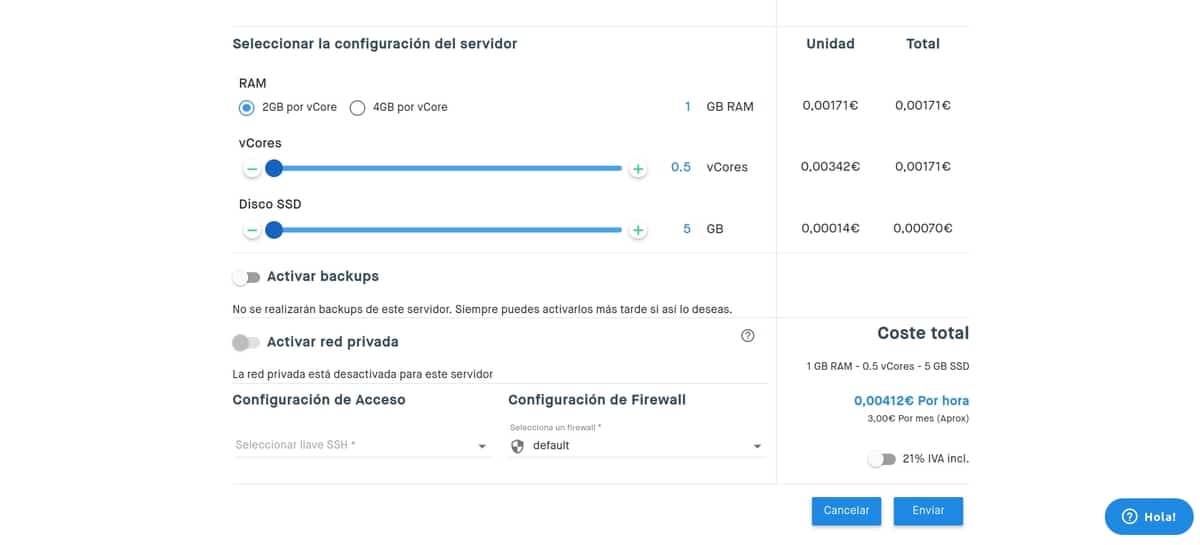
It is also important that you create the SSH key, giving whatever name you want. That will allow you to download the pair to be able to access remotely without having to enter the password manually every time you want to enter. In addition, it also allows you to configure the Firewall or backup copies. In this case, both the backups and the firewall we leave it as it is.
If you are done, check that everything is OK and pulsa Send. That redirects you to another screen with your cloud instance created. But in the status section you will see that it is being created:
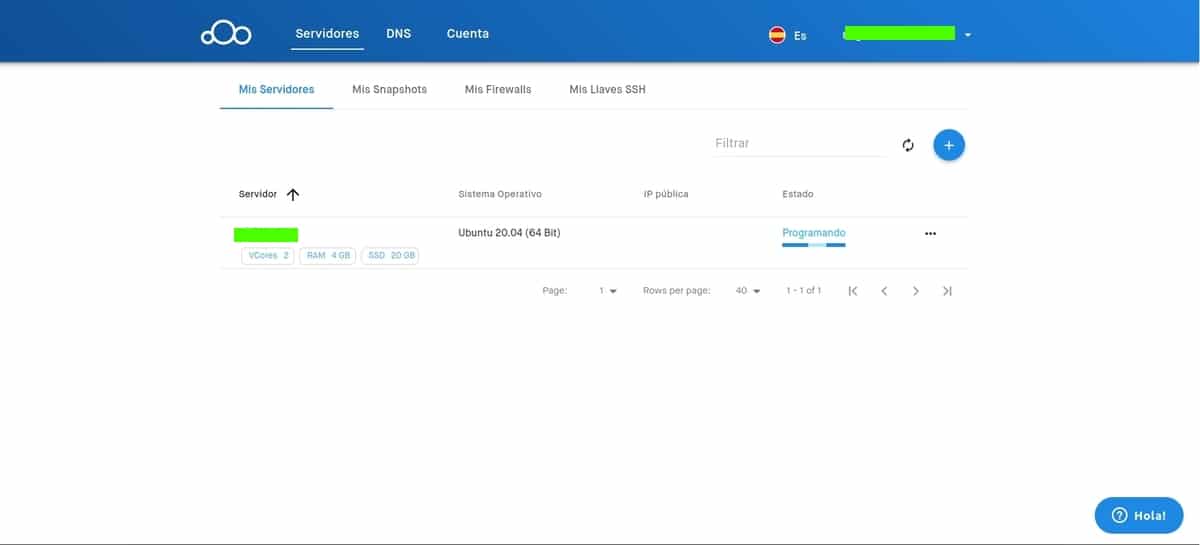
In the blink of an eye, your system will be installed and configured. Then the status will appear as Assets. And you can already use it.
Click on the name of your server on this screen and it will take you to a summary with details:
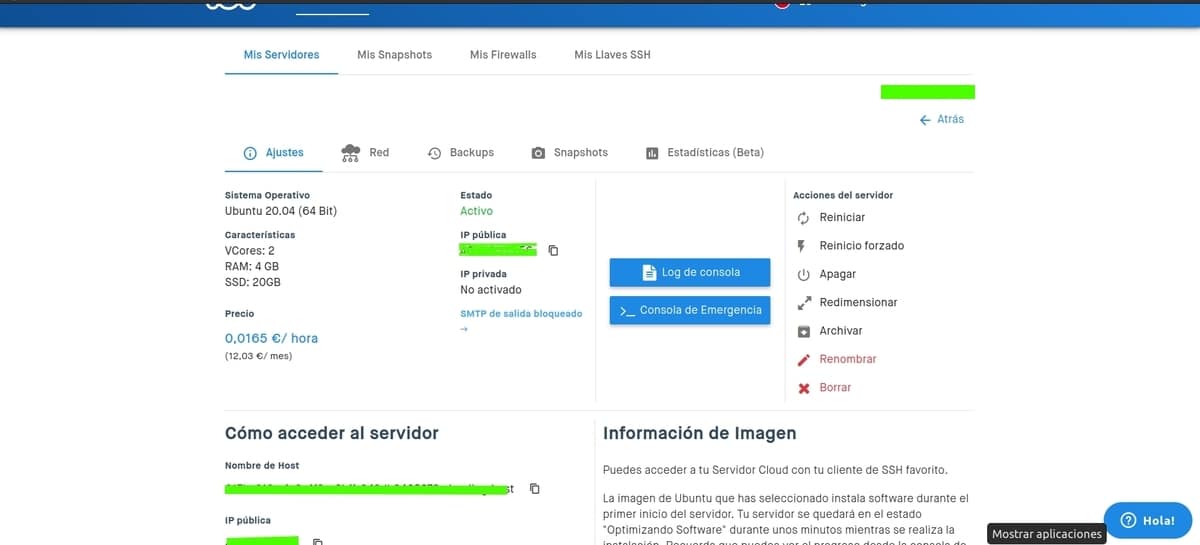
If you scroll, you will find the section How to access the server. It is very important, since this is where you will find everything you need to access and manage your server. For example, you can download the SSH key, or you can see the public IP to access by SSH, the username (root), and the access password:

Do not lose this data, since you will need it in the next steps to start installing Tensorflow on your Clouding instance.
Pre-requirements
To get started, the first thing to do is satisfy some dependencies or packages that will be useful for Tensorflow, as well as update to ensure that everything is in its latest version. To do this, we are going to enter the terminal to connect them by SSH with the password and the IP that I showed in the previous image to access the instance remotely from your distro (remember to replace youripdelserver with the IP of the Clouding instance):
ssh root@tuipdelservidor
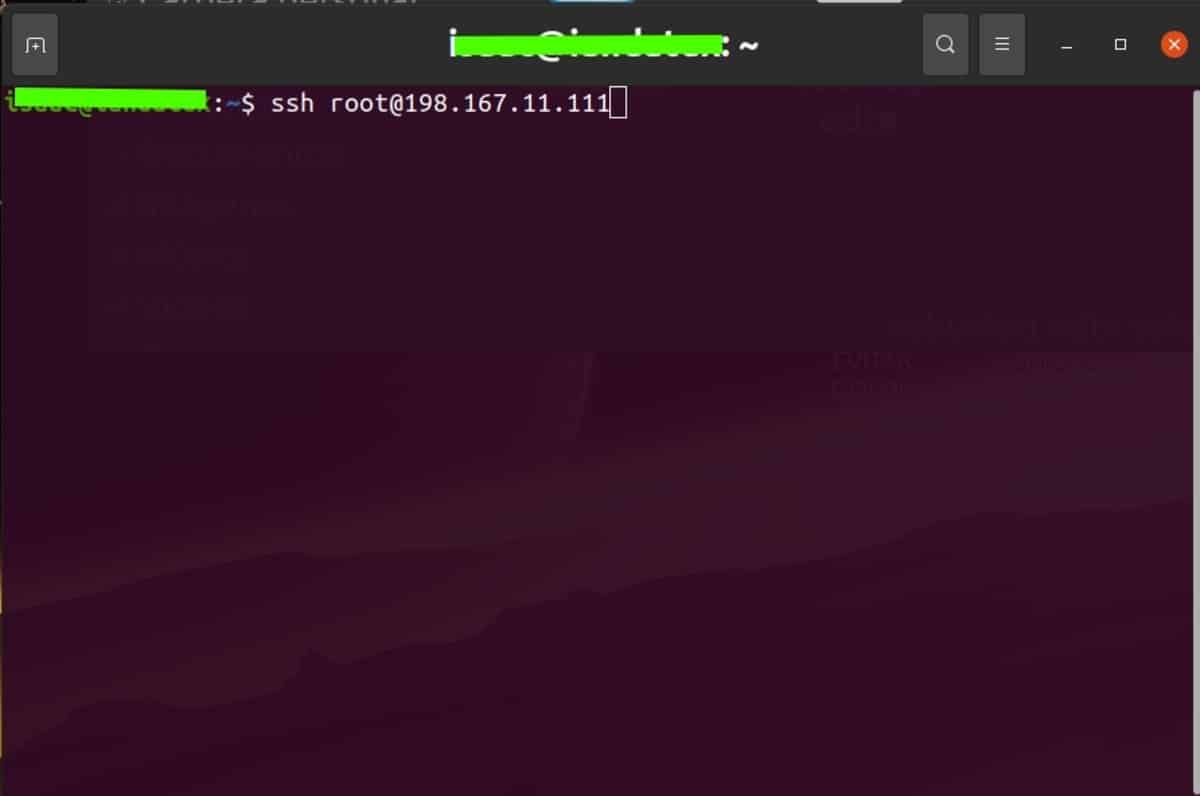
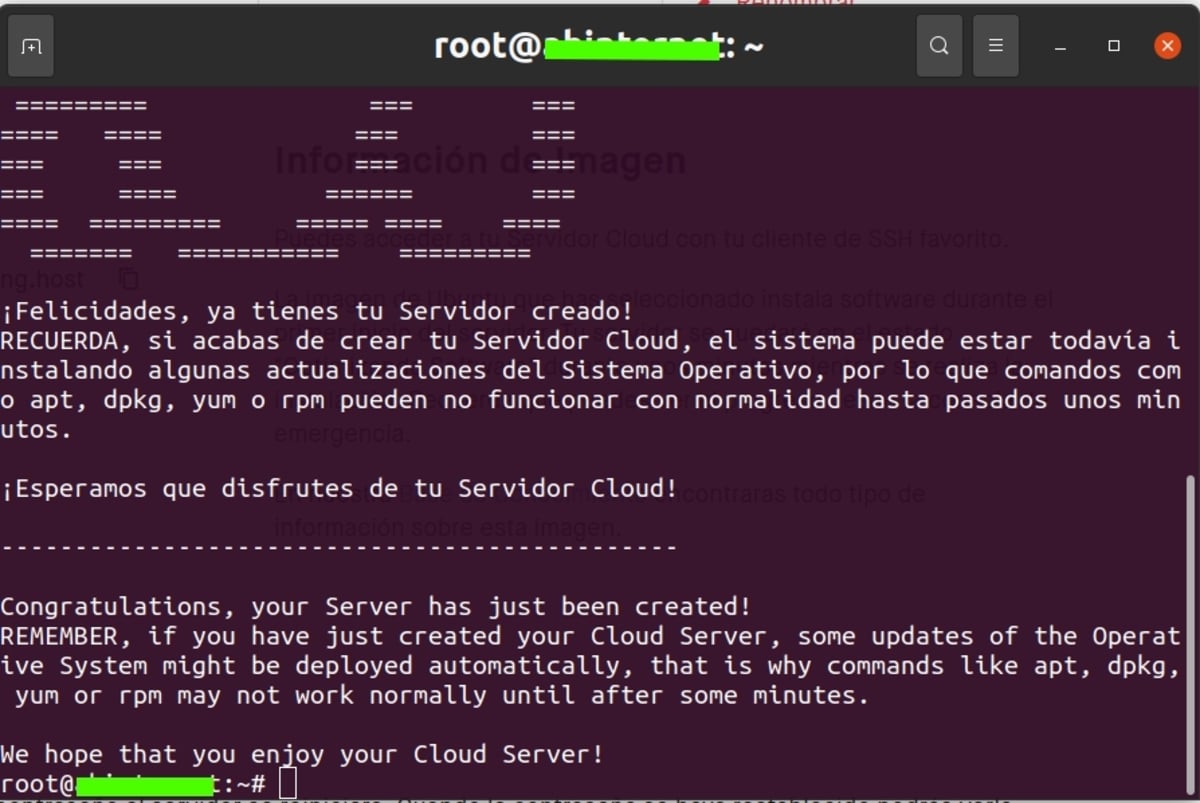
It will ask you for the password of the instance that you will also have to enter and that will give you access. You will see that the prompt of your terminal is no longer yours local, but you are inside the cloud server. Therefore, all the commands you run from now on will take effect on the instance and not on your local system.
Now the first thing is update the system with the following commands:
apt-get update && apt-get -y upgrade
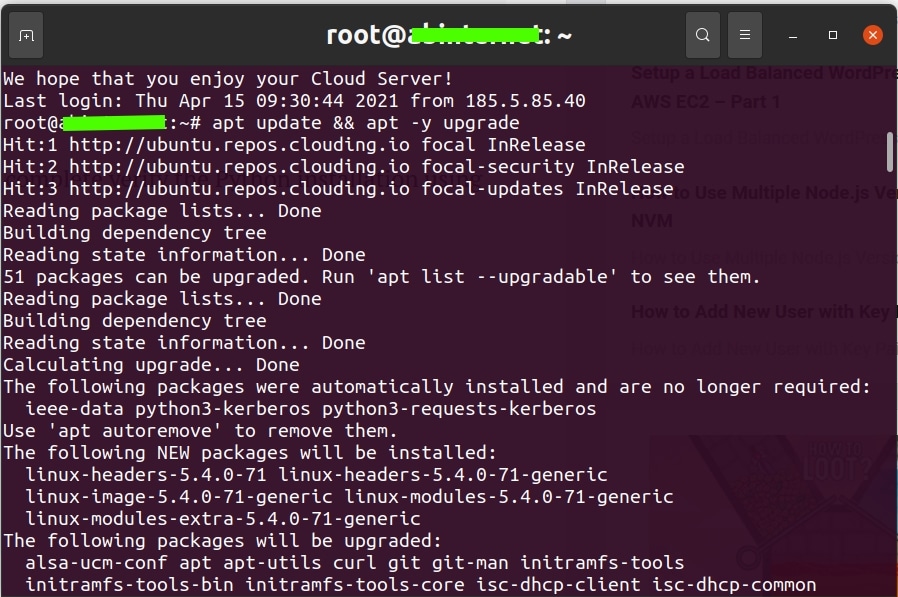
Now, you must install python3 and other auxiliary packages you will need:
apt-get install python3 python3-pip python3-dev
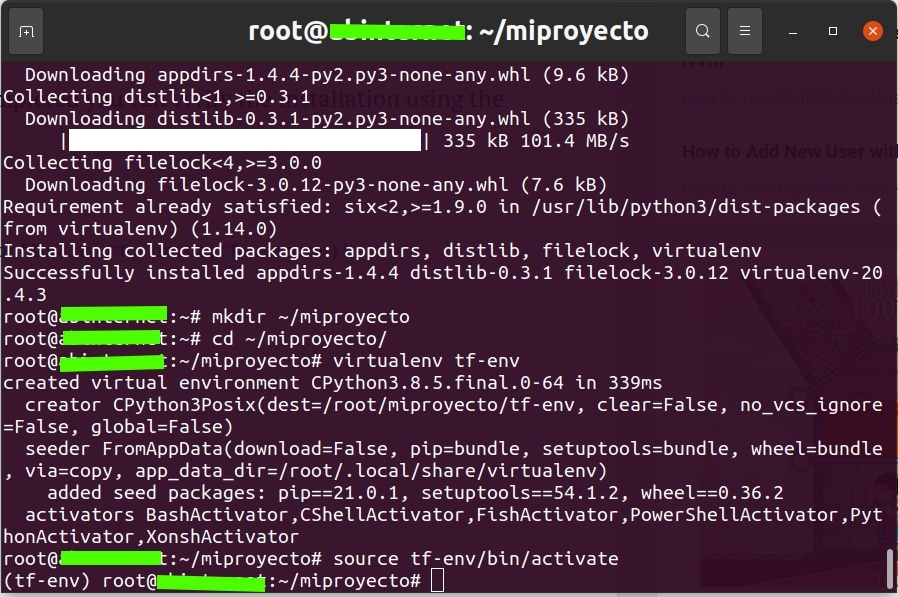
The next is prepare the virtual environment, using the virtualenv module, which is part of the Python3 standard library:
pip3 install virtualenv

mkdir ~/miproyecto

cd ~/miproyecto

virtualenv tf-env

source tf-env/bin/activate
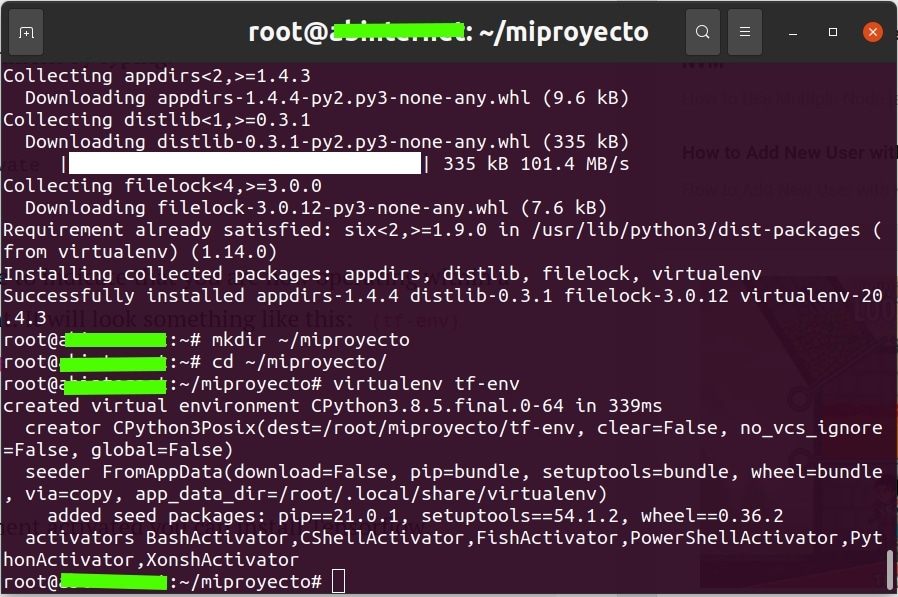
After that you will notice that your prompt has changed, and now it shows tf-env before the username and host.
Install Tensorflow (CPU support)
Everything is ready for the TensorFlow installation in your Clouding instance. The next step to follow would be:
pip install --upgrade tensorflow
Once it has been installed, you can verify installation using the following command:
python -c ‘import tensorflow as tf; print(tf.version)’
And that should return you an output with the version of Tensorflow installed. From there, you could start using Tensorflow for any task you need ...
Conclusion
In conclusion, the facilities that Clouding offers to work with its VPS make the experience to install any project like Tensorflow, or make configurations, be as easy as doing it on your local machine. Only with the power and scalability of this type of server.
In addition, its control panel is quite intuitive and the wizard guides you even if you do not have great technical knowledge. On the other hand, the options it gives you are also very flexible, being able to choose both the virtual hardware resources you need, as well as the operating system. This versatility makes it perfectly adapted to your needs, no matter how particular they may be.