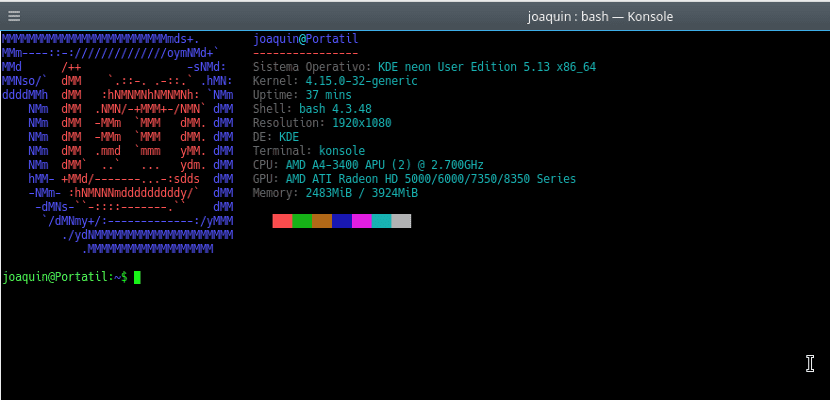
The terminal of our Gnu / Linux distribution can be customized like the rest of the distribution. The customization of this tool can be simple like changing the color of the text or a more disruptive customization like the inclusion of the distribution logo in ASCII code or computer information.
The latter has become fashionable since it makes the terminal more user-friendly and can even help to know certain parameters of the operating system such as the kernel we are using, the desktop that is loading or the memory used.First We have to install the Neofetch tool that will allow us to display this information in the terminal. Noefetch is in the official repositories of the latest versions of the main distributions, but if it is not we have to consult in the official documentation to install Neofetch. In my case, the version is Ubuntu 16.04 so I had to do it manually. Once we have the program installed, we must indicate that the program is loaded when we start the terminal.
Esto It is done by opening the .bashrc file that we have in our home. At the end of that file we will write the word "Neofetch" and save the document. This will make this tool run every time we open the terminal.
But it can be further customized with colors, images, logos, etc ... We can do this by opening the file /.config/neofetch/config.conf . In this file we will find all the program settings. Its manipulation is easy. At the beginning we will find lines like the following:
info "Kernel" kernel
This indicates that the program will show information (info) of the kernel with the name «Kernel». We can change the word "Kernel" or the one in quotes to whatever we want, but always in quotes. If we want certain information not to be shown, then we have to place a hash at the beginning of the line, looking like this:
#info "Kernel" kernel
But there is still more. If we want we can change the distribution logo and the colors of this logo written in ASCII. For this we have to go down in the previous file to the section "# Ascii Options" In it we look for the section
ascii_distro="Linux Mint"
And in it we change the name of the distro that is in quotes for the distribution whose logo we want to use. If we want to use the same one from our distribution, then we have to leave it like this:
ascii_distro='distro_name'
At the bottom of this line we will find how to change logo colors. This is done by modifying the line
ascii_colors=(4 1 3 5 6 2)
The numbers represent a color, we have to change them depending on the colors we want or directly use the color combination of the distribution, in this case we have to change it to
ascii_colors=("distro")
This will allow us to fully customize the terminal of our distribution and can even help us to confuse users outside our computer. You choose.