
Do you know what a Bootable USB? Carrying our favorite operating system or our favorite operating systems in your pocket is great and very comfortable. Especially if the well-known BYOD (Bring Your Own Device), ie "bring your own device." It is much more comfortable to carry a pendrive than a whole computer. And not only that, you may be interested in having the mobility and comfort of a Live, but with the possibility of saving configurations and changes, which allows you a USB memory.
It is also not a bad idea if you are a security auditor to run your own distribution or tools on a pendrive, nor is it crazy if you dedicate yourself to repair equipment. A technician could have Linux distributions destined to the analysis and repair of equipment in a single pen, providing a source of tools with total portability and independence from the equipment we use. In short, whatever your task, the tutorial that we present gives you absolute mobility.
Like I said, have a LiveCD or a LiveDVD It is a good option to use certain tools or certain Linux distributions at any given moment, loading it from the RAM memory of our equipment without having to install it, and on any equipment. But what happens when the computer in which we want to start the system does not have an optical reader, as is the case with many modern portable computers, or what happens when we want to save some data or configuration, since a ROM memory such as that of an optical support does not allow it, but a flash memory does.

Therefore the flexibility of having a bootable USB memory with our favorite operating systems or distros and being able to count on the changes persistently is an advantage (when we unplug the pendrive from the USB port, everything will not be erased as it happens when removing the CD / DVD Live, since RAM is volatile). Yes, I speak in plurality since you can have different operating systems in a USB memory as if it were a traditional hard disk. A bootable pendrive with multiboot And that is precisely what we will explain to you how to do it step by step from your Linux distro.
In addition, for users who need to have a pendrive for install Linux from USB or for Windows 10 installation on any PC, whether or not it has an optical drive, you will also find an interesting section in this article. Windows 10 has grown and many developers have also been interested or attracted by that integration that Microsoft has made of Bash in one of its latest Builds or updates. If you want to use Bash, that "bit" of Ubuntu in Windows 10, you will also find a guide.
Our proposal to create a Bootable USB
You can modify the steps that we teach you to your liking to install different operating systems that interest you or different tools. You can replace our suggestions with very different ones that better suit your work or needs. Also you we explain how to make a multiboot, which is more complex, but if you want to install only a distribution or operating system, you can guide yourself through our steps, but only put an OS.
Our proposal, from LxA is to install Ubuntu on the pendrive together with Hiren's Boot CD, what we get with this is to have a friendly and generic distribution for our work and a lot of bootable tools to repair our equipment, analyze viruses or carry out other checks. However, as I say, you can substitute Ubuntu for any other distribution you like or any other operating system you need. The same with Hiren's Boot, replace it with other tools such as Rescatux or Super GRUB Disk, with a Microsoft Windows system in dualboot with the distro or whatever you want. Do you need more than two? Well, go ahead too ...

The necessary material for this you will need is:
- A team with a Linux distribution (You can do it from other operating systems like Microsoft Windows using tools like Easyboot).
- Un pendrive or USB memory, it can be an external hard drive as well.
- The MULTISYSTEM, although other alternatives could be used.
- All the ISO images of bootable operating systems or tools we want to include.
- And of course tiempo to do it…
Create a Bootable USB with your favorite distros
Yes now, we explain step by step the procedure of how to create your bootable USB with different systems, you will see how it is simple:
Download and install MULTISYSTEM

MULTISYSTEM It will help us to properly install all the operating systems or bootable tools that we need within our USB memory and configure GRUB properly:
- Download MULTISYSTEM
- Unzip the package to extract the .sh script that comes inside.
- Now you can run it from the terminal with sudo ./install-depot-multiboot.sh or do it from the graphical interface by double clicking on install-depot-multiboot.sh.
- A menu should have been displayed in which you must select run in terminal or if you have done it directly from the terminal, you don't have to follow this step ... By the way, it will ask you for the root password because it needs privileges.
- Now you can launch MULTIBOOT from the application menu or from the console invoking its name.
Use MULTIBOOT
When we launch MULTIBOOT, we see that it is a graphical mode program, it is intuitive and easy to use, that is why we have chosen it. In the main window you can select the USB memory in which we want to perform our operation and even change program language.
Now everything is ready to start the really good work:

- Once selected USB memory and we validate. It will notify us that GRUB is going to be installed and we wait for it to be done.
- It will present us with another new screen where we can drag and drop the ISOs (in the box that says Drag / Drop ISO / img) of our operating systems or bootable tools, it's that simple. Another option is to search for them from your menu. We have previously downloaded these ISO images, in this case Ubuntu 16.04 and Hiren's Boot CD 15.2.
- Once we have added it, we will see that the MULTIBOOT itself will installing properly on the USB. Wait for it to be done and repeat the step as many times as you want to add systems.
Modify GRUB
Once we have added everything necessary to our USB memory, you will see that on the MULTIBOOT screen there are other tabs such as Test, Non-Free, About, Menus, where we can modify the bootloader config:
- Click on the MENU tab by MULTIBOOT.
- Ingersa in GRUB settings.
- In the new pop-up window you can change text colors, GRUB background and add a custom image. If you are not an advanced user, better not modify grub.cfg, menu.lst, and syslinux.cfg.
- Now gives us several options, among them we can see how our GRUB has been if you want to do it.
- We finish and take out our USB from the port safely.
Boot our bootable USB for the first time to test it

You already have it! Now comes the litmus test, test if your bootable USB works with the system / s that you have put into it. It is as simple as clicking the pendrive or your USB memory (since it could also be an external hard drive) and starting the computer. Remember that for it to work you must enter your BIOS or UEFI and modify the priority of the Boot Priority menu.
Depending on the equipment, or rather, depending on the brand or model of BIOS / UEFI of your team you will have to enter it in a different way. Generally, you must press the Delete key as soon as you turn on the equipment several times and you will see how to access the Setup menu. In other computers you must press Esc or F2, you can consult the manual of your motherboard or laptop to know what to press in each case. If you don't have it, you can get it from the manufacturer's website or simply go to Google to see which is the correct key.
In some systems it also allows you to directly access the Boot menu by pressing F12 or F8. If you do not have the option of direct access to the Boot menu, then you must scroll to that tab using the keyboard arrows to move through the BIOS / UEFI and change the priority putting your USB as the primary device so that it is the first one in which find the operating system to boot. If you have doubts, I already explained it in more detail in our article on how to install with multiboot Ubuntu 16 and Windows 10. Once done, press F10 to exit and save changes ...

Et voilà, you have your bootable USB ready! Should appear to you the GRUB menu with the operating systems or options to boot ... Select the one you want and it will start.
Windows 10 Installation USB + How to Install Bash
Prepare the Windows 10 installation USB
Although here it says Windows 10You can also do it with another version of Microsoft's operating system, although Bash will only work if you have this latest version of Windows. The necessary material is:
- PC with Internet connection
- Pen drive USB 4GB or more.
- Image Windows 10 ISO (32 or 64-bit)
To start, the steps are:
- Insert the pendrive
- Download el necessary software to properly burn the ISO to USB. You must also access the official Windows website and download Windows 10 if you don't already have an ISO.
- Install the downloaded program.
- Open the program once the installation is finished.
- In Browser find the ISO image Windows 10 and add it before clicking Next. If you get an error, you may have to use the Rufus software. If what you want is to install Windows 10 directly on the USB as we did in the previous section with Ubuntu and Hiren's, you can also use the EasyBoot program.
- Now press create USB device.
- They will show you the devices USB connected, choose the one you want to use if there are several and then click on Begin copying.
- Wait for it to complete the process and the message of Booteable USB device appears to close the program.
You already have the bootable USB device to be able to boot it, previously selected the appropriate priority in the BIOS / UEFI as explained above and follow the steps of the Windows 10 installer. If you want to know how to install your Linux distro with Windows 10 on the same PC with dualboot, you can see our tutorial.
Install and use Bash in Windows 10
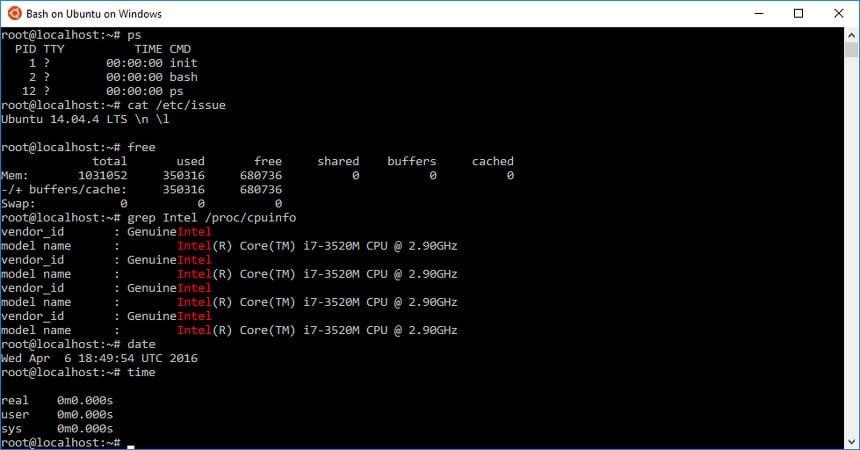
To dispose of this bit of Ubuntu within Windows 10, the step-by-step procedure is:
- Sign up for the program Windows Insider from this website to receive special updates.
- Go to Windows Update.
- Then Advanced Options.
- Press «Get Insider builds«.
- Then activate the developer mode in Windows Update, «For developers» and «Programmer mode«.
- Check for updates for them to download and install and reboot your system when prompted.
- Among the updates should be the one that integrates Bash with Windows 10.
- Now, once restarted, go to Control Panel, Programs and "Enable or disable Windows features."
- Look for one of the entries that says «Windows Subsystem for Linux»And activate it. It will ask you to restart, do it and that's it.
- Now you can already use bash, To do this, search for it ("bash") in the desktop search engine and you will be able to select it ...
Remember to leave your comments, be it some suggestions, doubts or anything else you want to express about this article. I hope it has helped you and serves your purposes ...
I have a problem, in the installation for Fedora (Gnome Environment) I get "ERROR: XTERM" and the same thing happens in Linux Mint (Cinnamon Environment), the same error appears in both distributions. Can someone tell me what's up?
You have to install xterm and then multisystem.
Well, I'm in the same case as jhonatan with linux mint 17 cinamon. In the installation process, the repository update window opens, but it stays there and does not indicate whether to add any.
Anyway, thanks for the tuto. It's great. And I no longer tell you if I can get it to work ;-)
Hello, as I understand you can have windows and ubuntu on the same usb? I have tried but multisystem tells me that windows 10 usb is not supported at the moment :(
Try to follow this procedure on Lubuntu 14.04, Install MultiSystem, the program opens correctly, but it does not recognize the USB Disk, it will be mounted on / media, so, I cannot create the Bootable USB, until there it goes.
did you solve the problem?
Good afternoon, I have tried several times to boot from the USB hard disk with the same "Missing system error" result. I have done the whole procedure from the beginning every time. Thank you.
Good afternoon, I have carried out the procedure several times with the same result, once it tries to boot from the USB (hard disk) the message "missing operating system" appears. Could you help me?.
Thank you
Hello, since I recovered my computer I have been trying to change its system and I want to try it, but I don't know where I can download the multisystem, could you tell me where I can download it?
I like motoooooooos !!!!!!!!!!!!!!!!!!!!!!!!!!!!!!!!!!!!!!!!!!!!!! !!!!!!!!!!!!!! 11111
it weighs more than what I want to install… ..I run out of data.
Good afternoon, I have tried a few times to start the operating system from my bootable USB. But I get an error and I can't fix it, Missing Error System. I followed the entire tutorial but I can't solve this problem. For those who have this problem I found another option that can solve it, in this website briefly describe it.
Regards,
As expected, and it's the fifth tutorial I read, IT DIDN'T WORK
But it is logical, it is Linux
To do something that in windos takes you two clicks
In Linux, it is also done in two clicks, but you don't know it because you don't know the tools that Linux offers you in this regard, so if, instead of learning first, we first criticize, that it is free ...
Here, in Linux, there is WoeUSB, Rosa, the usb-creator-gtk ... You have several options (all of them with GUI), but you didn't even know it ... Of course, criticize, a lot ...
The simplest thing, if you use a Debian-based distro, is a dd if = nameofisoperosinspaciosotedaraerror.iso of = / dev / sdx where x is the letter that your USB memory occupies in the device hierarchy (a, b, c….) , you wait for it to finish and voila, working. (It is not that you put the name of the iso without spaces here, it is that if the iso has a name with spaces, first you change the name, so as not to leave spaces and then you copy it (the name of the iso) in the command and done, zero problems).
You're welcome.
No offense, but there are simpler options:
1) The new version of WoeUSB with GUI
2) Install the boot disk creator that have distributions like Debian, Ubuntu, Sparky…. With a sudo apt-get install usb-creator-gtk you already have it installed. It only has one drawback, it does not look for .iso files but .img (In some distros, it has already been fixed and it looks for .iso). But it is as simple as that, if when looking for the .iso file you see that it cannot be found in the folder where you have it, you change the extension to .img and voila, with that it finds it and creates the image for you in the memory / HD USB.
3) Rosa (Rosa Image Writter), is an app that comes from a Russian distro called that and that allows you to create autoboot USB memories.
4) If you are using a Debian-based distro, do this, if the iso that you want to transfer to the USB has spaces in its name, rename it, removing those spaces, now see that sdX is your pendrive (it can be sdb, sdc ... depending hard drives you have in your PC). Type dd if = nombredelaisoinspaciosotedaraerror.iso of = / dev / sdx I repeat, the x represents the letter of your usb memory and is the letter that you must put instead of the x. You wait for it to finish and you already have your bootable USB created.
I hope you find it useful.
Rufus is a tool for Windows that allows you to create different types of bootable media for external drives, such as USB drives and SD cards. Its versatility makes it possible to form a disk and install Linux, Windows and even disk images for free, built into the tool.