
jailbreak (a form of privilege escalation) andIt's a process that is performed on iOS devices to remove some of the limitations imposed by Apple through the use of modified kernels (its equivalent in Android is root). The jailbreak allows users to fully access the operating system, allowing the user to download applications, extensions and themes that are not available through the official App Store.
Apple has tried its best to block the jailbreak, Since after a new bug was announced that was used to carry out the jailbreak process, Apple immediately worked to correct that bug and released updates to patch it. So it was increasingly difficult to find methods.
But tAll this change with checkm8, which is an xploit that acts on the bootrom (a read-only memory) and gives access to iOS devices that Apple cannot patch.
This exploit was taken as the basis for checkra1n (a community project), which since the last quarter of last year gave a lot to talk about and that so far in February the version for Linux was released (since previously it is only available for Mac OS).
With the arrival of the Linux version, the possibility of being able to Jailbreak was exponentially extended Since as mentioned above it was only exclusive for Mac OS and those who need to do the Jailbreak who do not have a Mac had to create a Mac OS image for their device (with many limitations and quite a few problems for its creation)
Although some time later a MacOS installation image modified with Checkra1n was released, although also with limitations due to hardware.
But all this changed with the release for Linux since it can be done directly from the installation or with a live version of the system (with this, those who use Windows and have no intention of using Linux, can do the process).
Our Process
In order to jailbreak Linux, just have any Linux distro, in my case I am currently using Voyager Linux (based on Ubuntu 18.04) since I left Arch Linux because my previous hard drive stopped working and I only had a USB with Voyager on hand to install on the new disk.
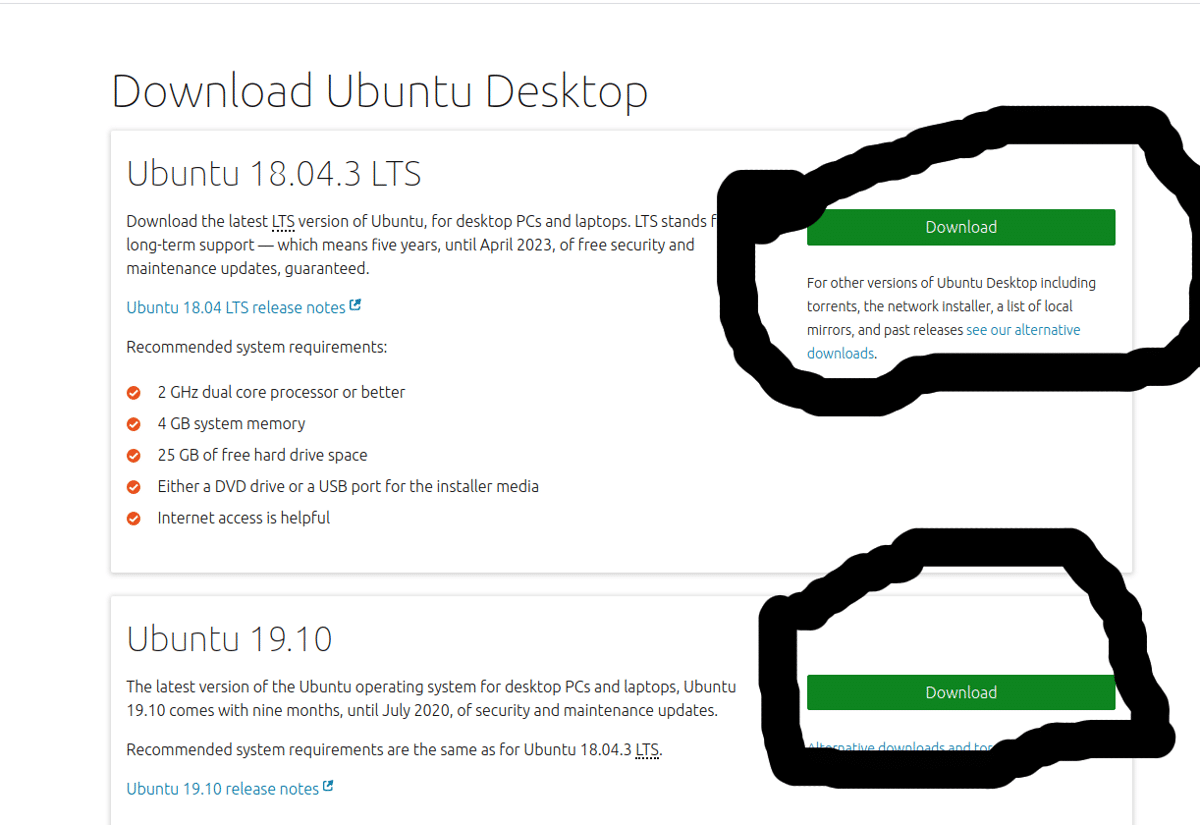
Moving on to the process, if you don't have a Linux distro you can use any but to make things easier if you've never used Linux go to the following link, where you will download Ubuntu (any version).
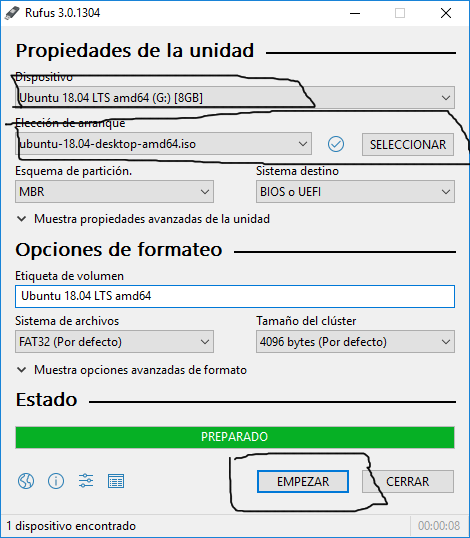
Now you are going to download rufus so you can create the bootable usb with Ubuntu, You connect your USB pendrive, select the Ubuntu image already downloaded, your device and start.
With this you must boot the device on your computer and modify the options of your BIOS to boot the system (if you do not know how to do it, look for a video on YouTube). On the first screen you will be asked if you want to install the system or test it live, here we go for the second option.
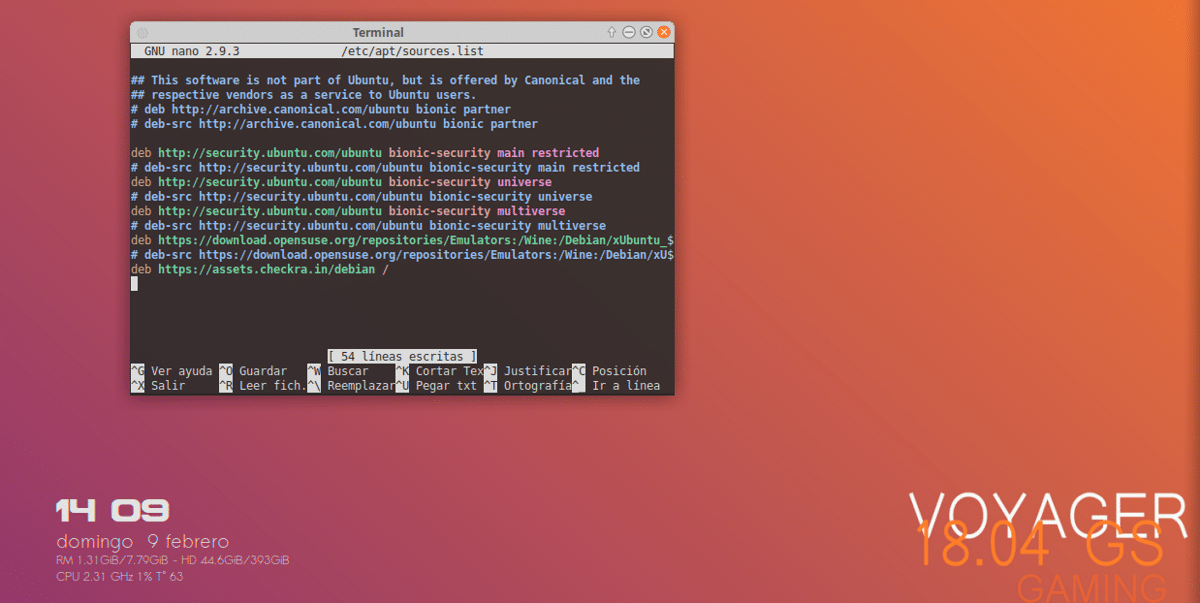
Already being inside the system let's download the checkra1n binary or if you are new you are going to open a terminal, you can search for "terminal" in the applications menu or open it with the combination of keys "ctrl + Alt + T". In her you are going to add the checkra1n repo with the following command:
echo “deb https://assets.checkra.in/debian /" | sudo tee -a /etc/apt/sources.list
Or you add it manually with:
sudo apt edit-sources
Here it will ask you with which editor, you are going to select "nano" and scroll to the end with the navigation keys or with the scroll and here you add:
deb https://assets.checkra.in/debian /
You save the changes with, Ctrl + O and close with Ctrl + X.
After let's download and add the public key of the repo:
sudo apt-key adv --fetch-keys https://assets.checkra.in/debian/archive.key
We update with:
sudo apt update
And we install the tool with:
sudo apt install checkra1n
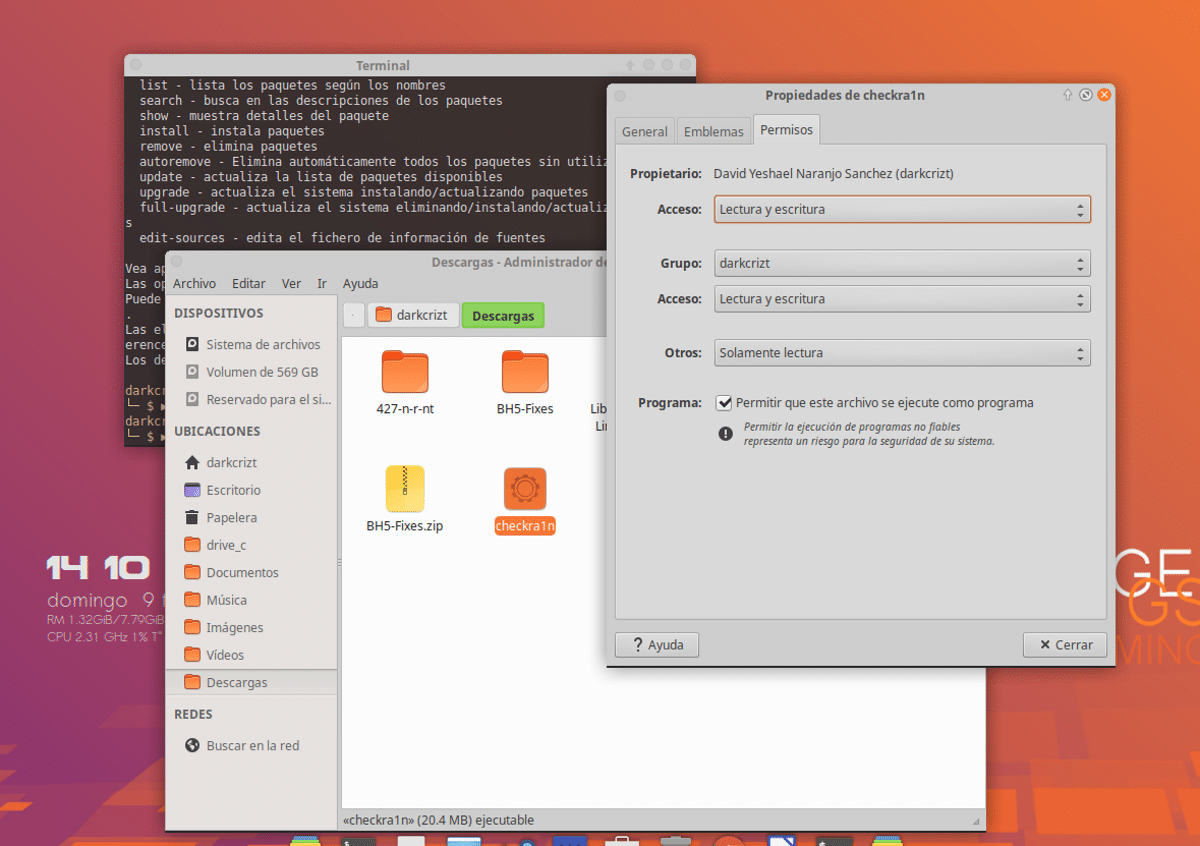
In case you have chosen to download the binary should only give it execution permissions:
And you proceed to run the tool (if you downloaded the binary) with:
sudo ‘/ruta/al/archivo/checkra1n’
Or if you installed from the repository, you look in the application menu for the launcher. Here if you use the binary you are using a CLI version (command line) or from the repo a GUI version (graphical version). In the same way, both work the same.
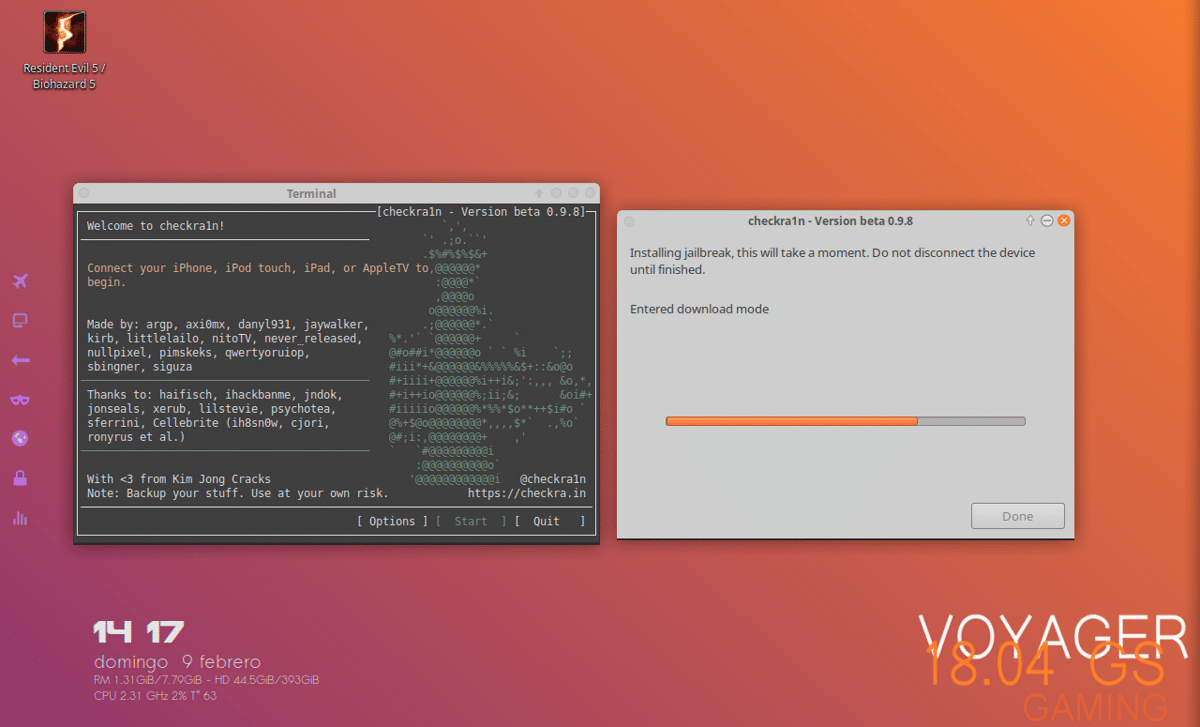
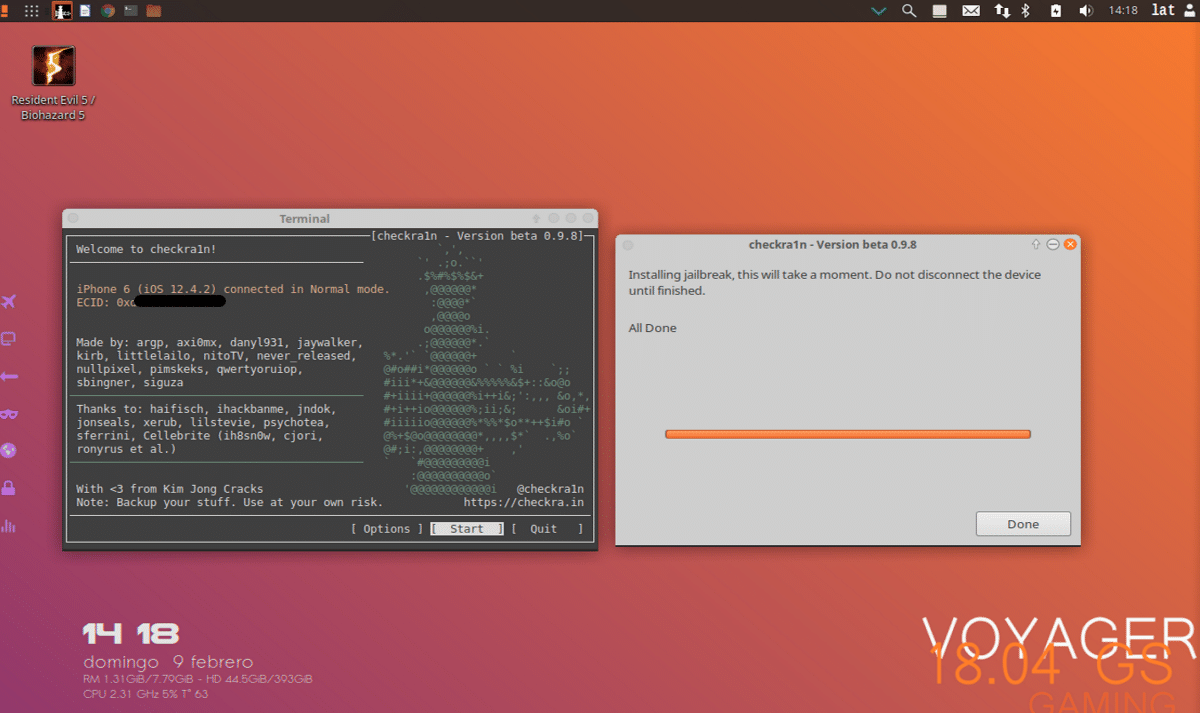
Done all this, you are going to connect your device and the tool should recognize it To start the jailbreak process by clicking on start or in the cli version you move with the navigation keys and with the space bar you start the process.
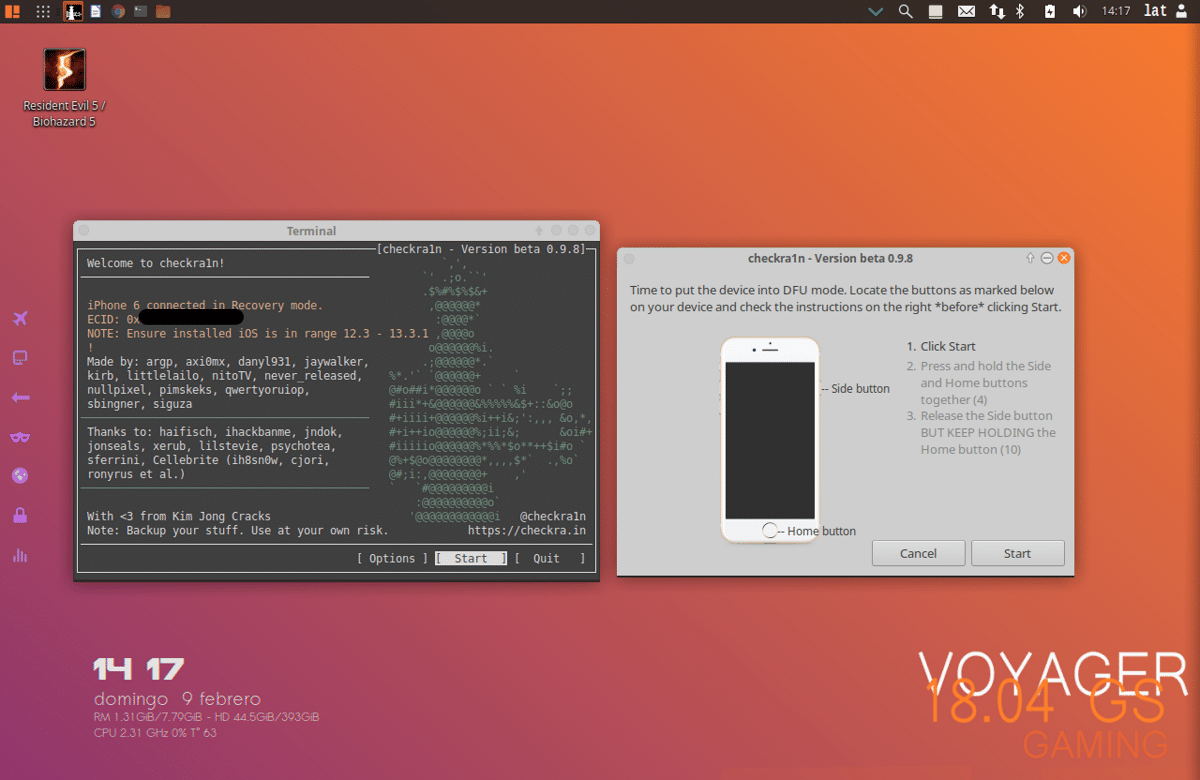
From now on the tool will guide you to put the device in DFU mode and that's it.
Very interesting. I recommend shutter for captures. It incorporates a mini-editor where you can add shaders, bookmarks, icons…. This way you don't have to mark the catches with freehand paint. It looks very good. And you can also embed the logo of your page if you want the captures. All the best.