
Si you are one of those who want to try Arch Linux and do not dare because the installation process is complicated or simply you are afraid to screw up and ruin the information on your disk, do not worry, Arco Linux is an excellent option so you can try the benefits of Arch Linux.
And that is why in This article I share a simple guide on how to install Arco Linux intended for those newbies who want to try Arch Linux without the hassle. For those people who still do not know this Linux distribution I can tell you that ArcoLinux (formerly ArchMerge) is a Linux distribution based on Arch Linux.
The ArcoLinux project has two editions, between the which includes the Xfce, Openbox and i3 desktop environments.
The second edition is a minimal platform, which only positions us on the command line, where the customization of the distribution is on us.
Using this mode ArcoLinux is focused on being a Linux distribution that is a learning point for all those users both new to Linux, as well as average users.
It is basically a free operating system, it is based on Arch Linux, this system also uses a development model called Rolling Release, so we only perform one installation and from then on they are only pure updates, thus leaving the versions, as is usually Ubuntu for example (Ubuntu 18.04, Ubuntu 19.04, etc.)
Without further ado, let's move on to the guide.
Download and prepare the Installation media
The first thing we have to do is download the system image and transfer it to a CD / DVD or a USB drive, we will download it from its official website. the link here.
Once this is done we proceed with the creation of the installation medium.
CD / DVD installation media
- Windows: We can burn the iso with Imgburn, UltraISO, Nero or any other program even without them in Windows 7 and later it gives us the option to right click on the ISO.
- Linux: They can especially use the one that comes with the graphical environments, among them are, Brasero, k3b, and Xfburn.
USB installation medium
- Windows: They can use Universal USB Installer, LinuxLive USB Creator, Etcher, among others, these are easy to use.
- Linux: The recommended option is to use the dd command, with which we define in which path we have the Arco Linux image and also in which mount point we have our usb:
dd bs=4M if=/ruta/a/Arco-Linux.iso of=/dev/sdx && sync
How to install Arco Linux
Once the system is booted, we will proceed with the installation of Arco Linux, the first thing will be to open the installer which can be found in the "Arco Linux" menu, here you can search for "ArcoLinux Installer" within the browser or in the menu applications.
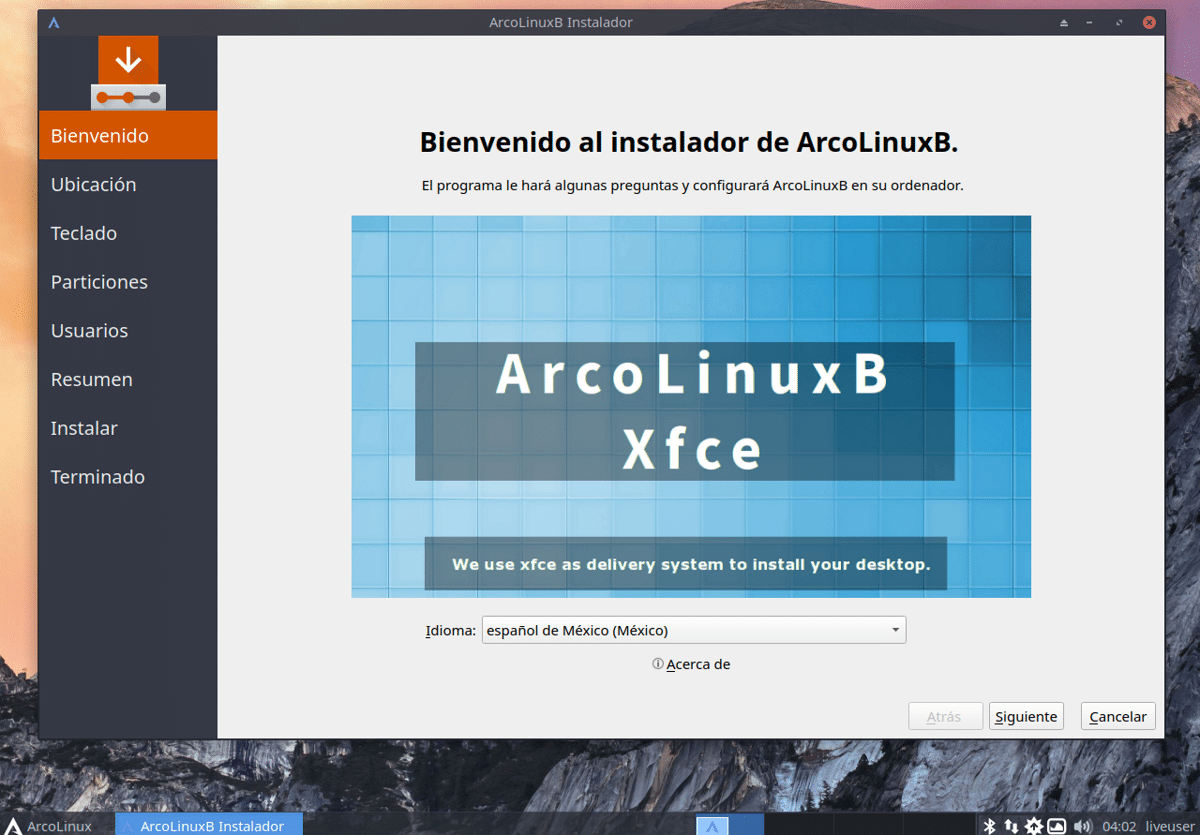
Done this The installation wizard will open, which on the first screen will ask us to choose the language in my case it will be in Spanish from Mexico. Once this is done, we click on the next button that is located in the lower left part of the window.
Location
Now it will ask us for our location as well as the time zone, which will be configured in the system to show the time of that zone.

We can also see two options below it, which is the language (previously established)
Then we click on next.
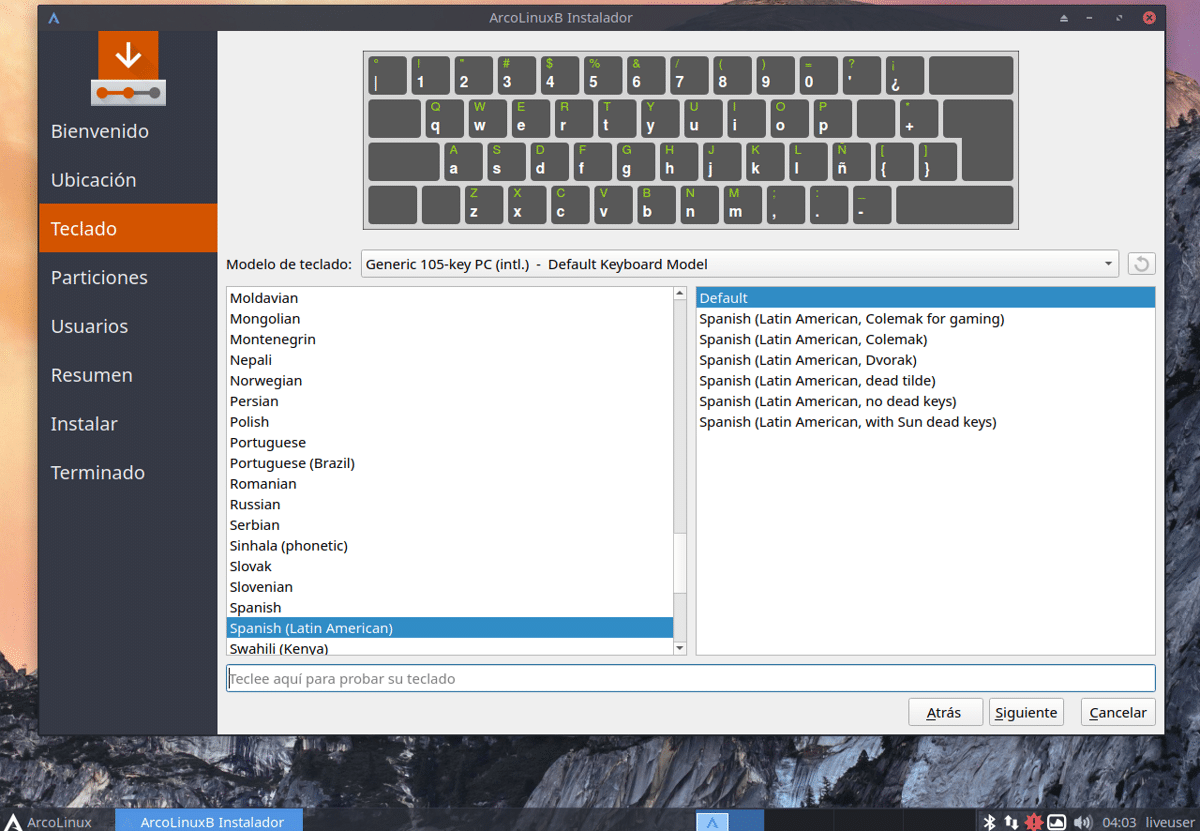
Keyboard layout
Now immediately afterwards it will ask us to confirm the distribution of our keyboard, which is generally detected by the system, but in case it is not the one shown on the screen, you can search for it within the options.
Choose installation path.
Now immediately afterwards it will ask us the way in which Arco Linux will be installed on our computer, here we have to do work.
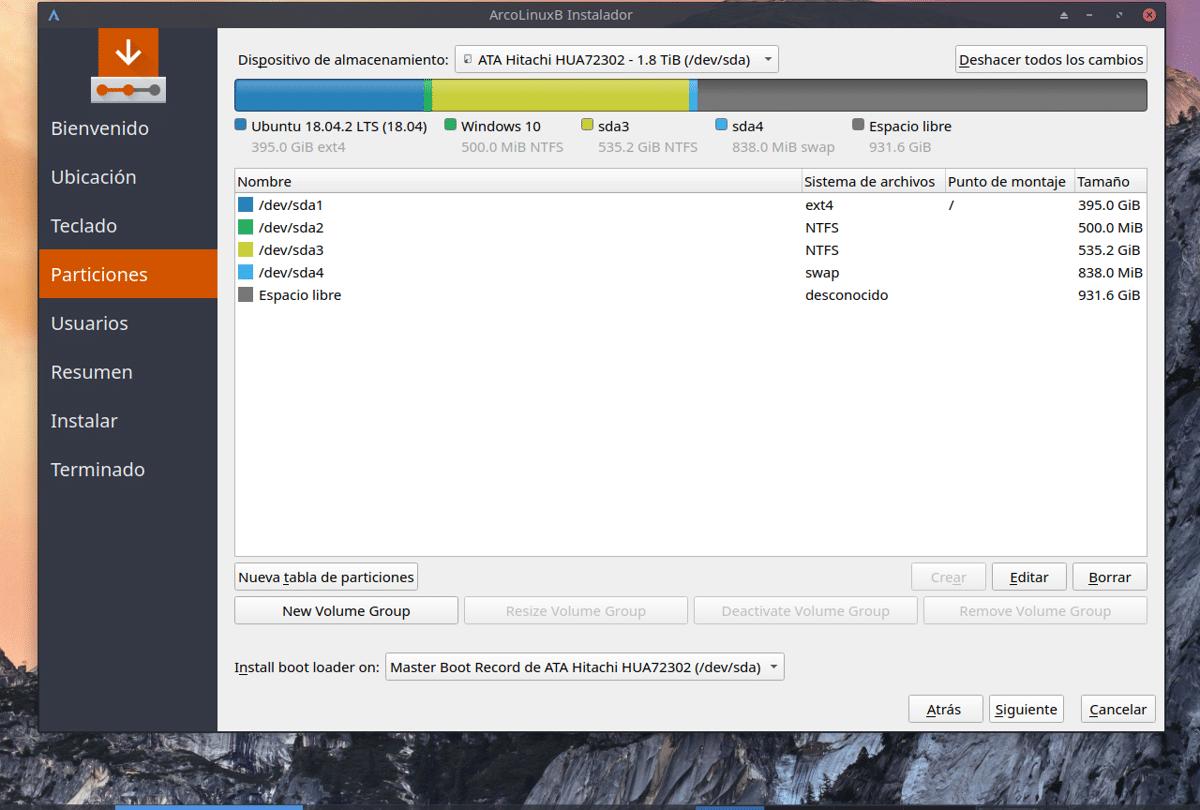
In my case, I am going to delete the partition where I had Ubuntu 18.04 installed and I will assign it the same partition that is destined for Swap, so I do not edit that partition and assign other partitions.
To delete, add or edit partitions we have the options just below the table. On the other hand, if we have more than one hard disk on the computer and it is not the one we are going to use for Arco Linux, at the top is «Storage devices»And there we look for the hard disk where Arco will be installed and it will load the partitions of that disk.
As for the partitions to create, the simplest is to just choose the partition where Arco Linux will be and we give it a mount point «/» with «ext4» file format and that's it.
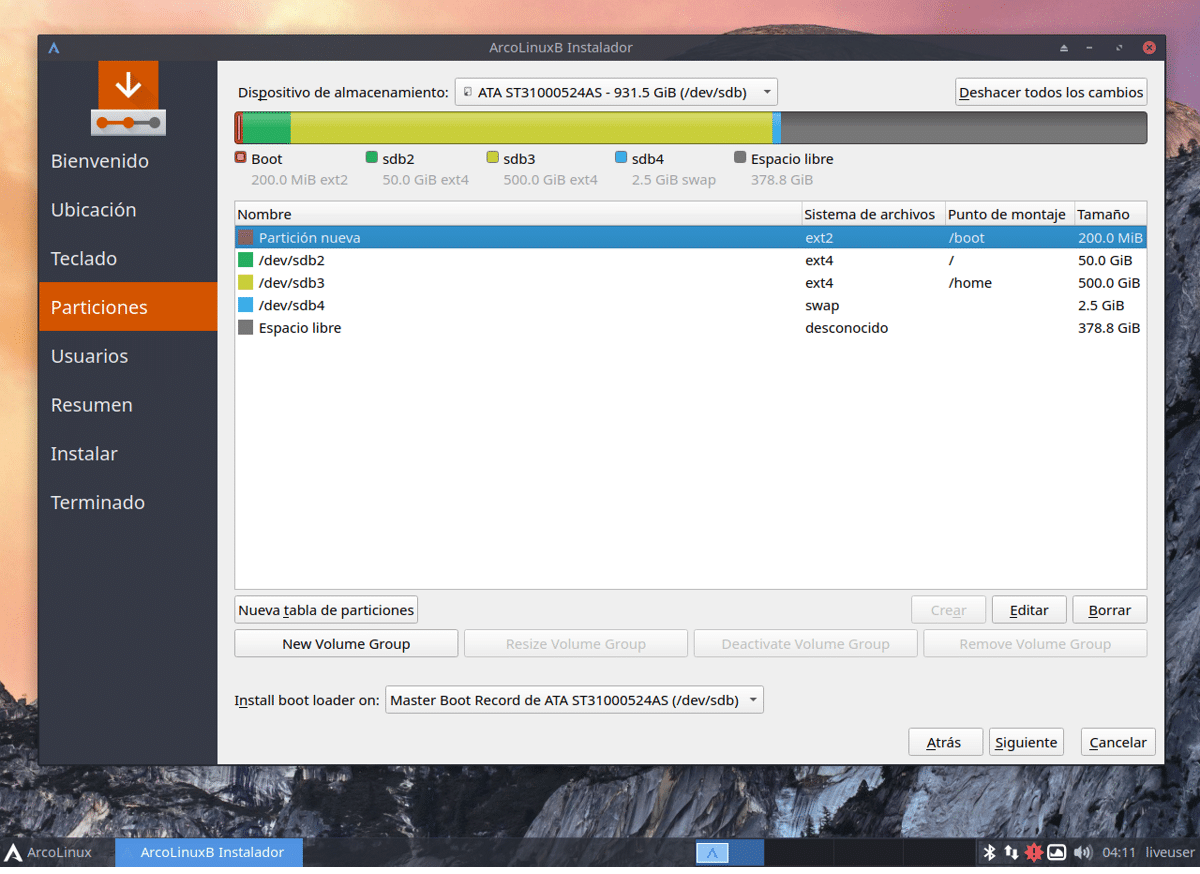
If you want a more customized installation, you can assign a partition for each mount point that you want this separately ie "boot" "home" "root" "swap" etc.
Finally at the bottom we can choose on which disk to install the "grub".
Once this is done, we click on next.
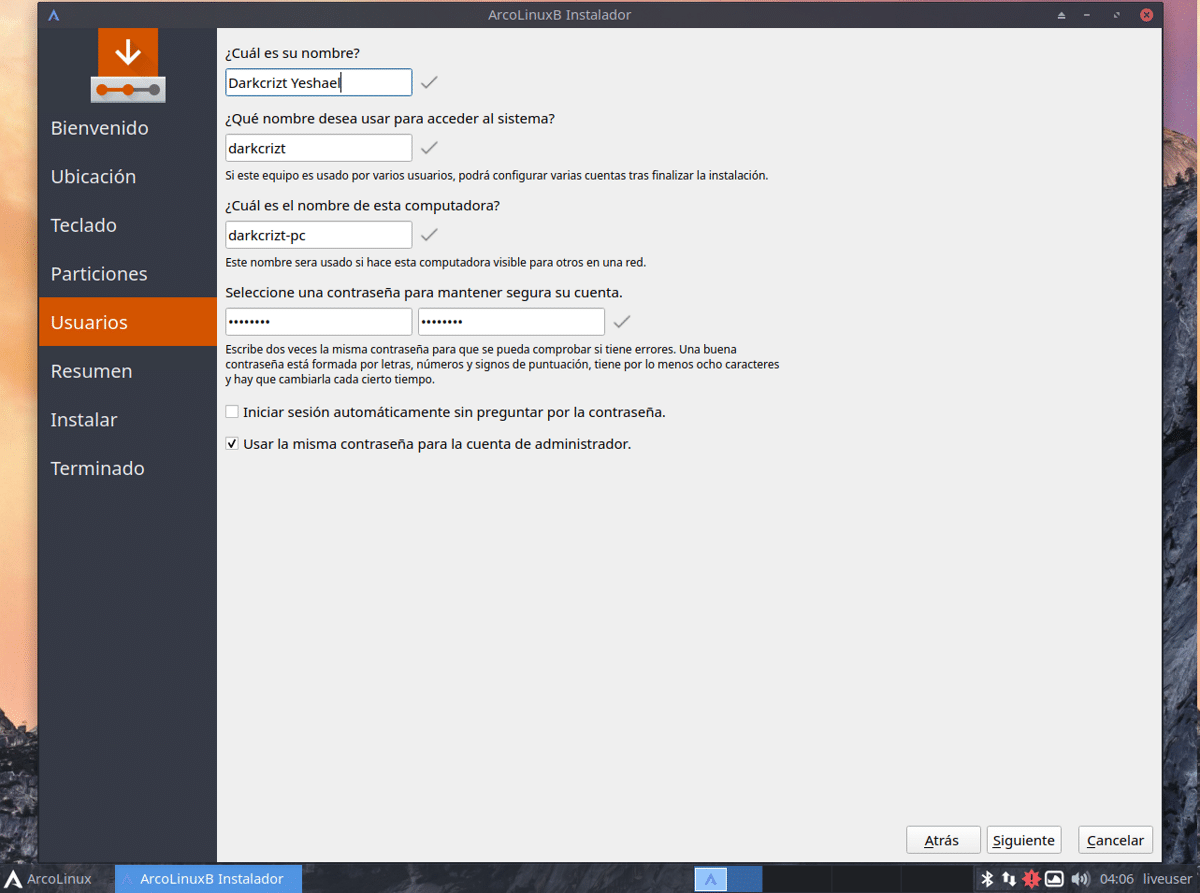
User and password
The last step is to create a user for the system and assign a password which we must remember, because it is the password with which we will log in to the system and with which we will work in the terminal.
If you want to create more users, you can do that after installation. Once this is done, we click on next.
This last window will show us the configurations that we indicate for the installation of Arco Linux and above all so that you are aware of what you are doing in the partitions of your hard disk. Since it indicates the changes in the partitions and / or disks.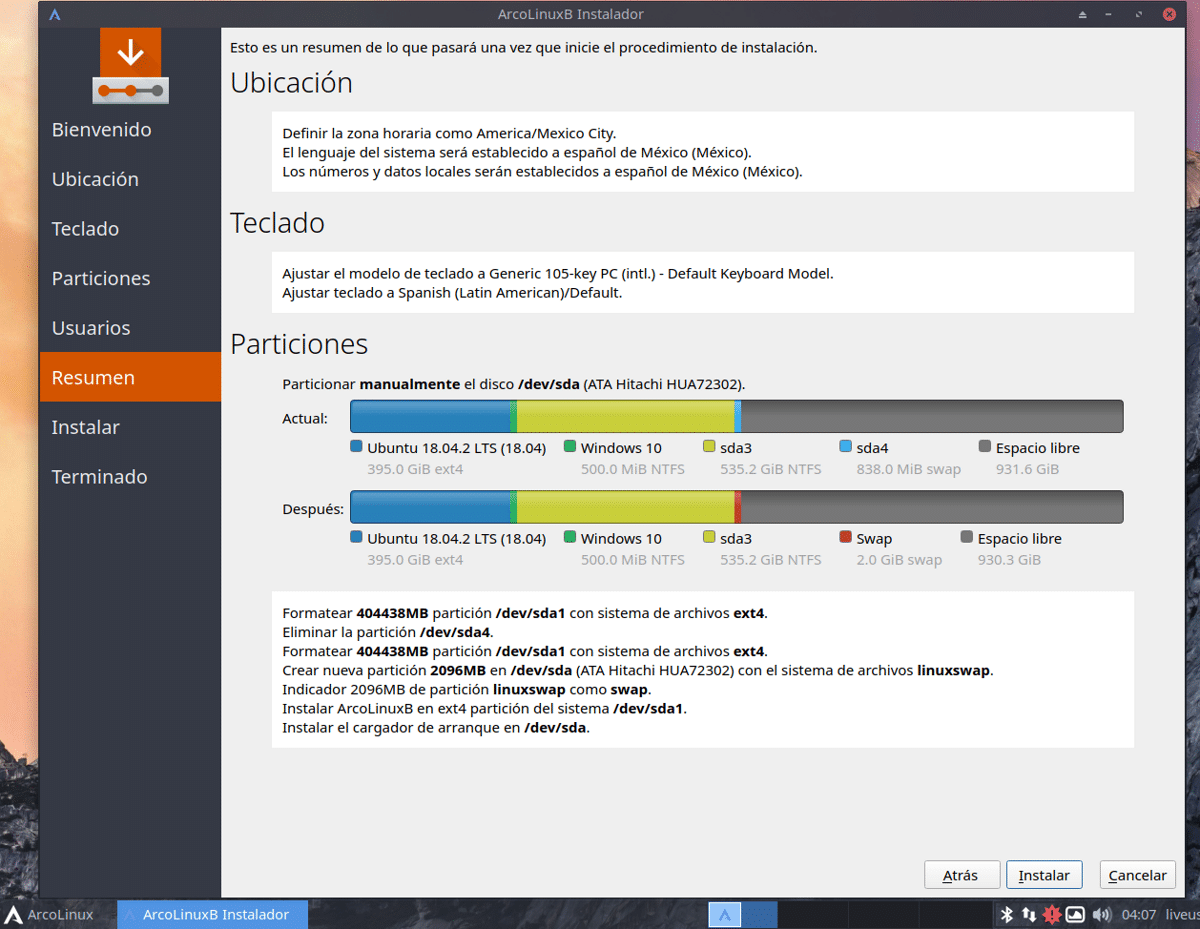
Once we are sure of what we are going to do, we click on install and we have to wait for the installation process to finish in order to enjoy our new system.
