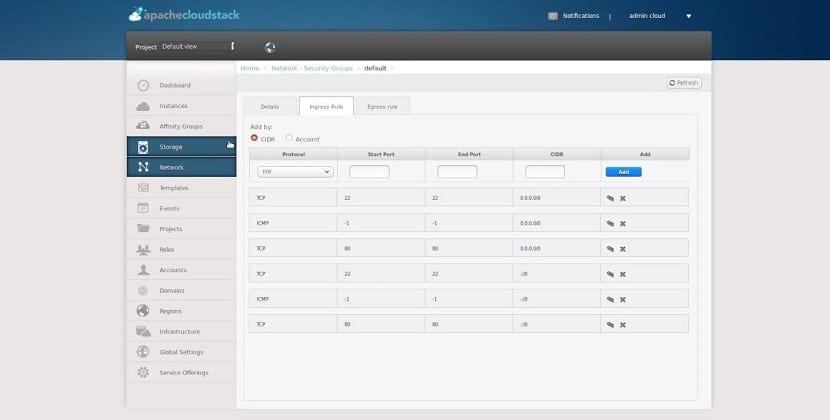
After a year of development, Launch of Apache CloudStack 4.12 Cloud Platform Released, which automates deployment, configuration, and maintenance of a private, hybrid or public cloud infrastructure (IaaS, infrastructure as a service).
The CloudStack platform was transferred to the Apache Foundation by Citrix, that received the project after the acquisition of Cloud.com.
CloudStack does not depend on the type of hypervisor and allows you to use Xen simultaneously (XenServer and Xen Cloud Platform), KVM, Oracle VM (VirtualBox) and VMware in a cloud infrastructure.
Se offers an intuitive web-based interface and API special for managing user base, storage, computing and network resources.
In the simplest case, cloud infrastructure based on CloudStack consists of a single management server and a set of compute nodes that host the guest operating system in virtualization mode.
In more complex systems, supports the use of a cluster of multiple control servers and additional load balancers. At the same time, the infrastructure can be divided into segments, each of which operates in a separate data center.
Apache CloudStack 4.12 Key New Features
In this new version of Apache CloudStack 4.12 we find that for solutions based on the KVM hypervisor Security Group support has been redesigned, the correct data about available memory has been transferred to the management server.
As well the influxdb database has been added to the statistics collector, as well as the implemented libvirt to speed up I / O and updating the VXLAN IPv6 configuration script.
In this version also DPDK support is highlighted which was included along with the added configuration to run on Windows Server 2019 guest systems.
For all types of users, the ability to create virtual networks at the data link layer (L2) is provided.
Ubuntu 14.04 support has been discontinued as official support for the Ubuntu 14.04 LTS release ends at the end of April.

Finally, we can also find that IPv6 support was expandedproviding the ability to send data through a virtual router and calculate IPv6 addresses instead of broadcasting out of the box from the pool.
For IPv6, a separate set of ipset filters has been added.
Of the other novelties that we can find in this new version, they are:
- Live migration of virtual machines with root partition in file storage implemented
- Support for remote debugging of management and production servers, as well as KVM agents, was implemented.
- Support for offline migration of VMware environments was added.
- A command has been added to the API to display a list of management servers.
- The libraries used to build a web interface (eg jquery), have been updated.
- XenServer supports online migration from unmanaged vaults to managed vaults.
- The client interface offers the ability to edit the protocol in ACL rules.
- Added the ability to remove local primary storage. The properties of the network adapter provide a display of the MAC address.
How to install Apache CloudStack on Linux?
For those interested in being able to install Apache CloudStack pYou can do it by following the instructions we share below.
Apache CloudStack offers ready-made installation packages for RHEL / CentOS and Ubuntu. So to download them we are going to open a terminal and execute the following in it.
For Ubuntu:
wget http://download.cloudstack.org/ubuntu/dists/bionic/4.12/pool/cloudstack-agent_4.12.0.0~bionic_all.deb

wget http://download.cloudstack.org/ubuntu/dists/bionic/4.12/pool/cloudstack-common_4.12.0.0~bionic_all.deb

wget http://download.cloudstack.org/ubuntu/dists/bionic/4.12/pool/cloudstack-docs_4.12.0.0~bionic_all.deb

wget http://download.cloudstack.org/ubuntu/dists/bionic/4.12/pool/cloudstack-integration-tests_4.12.0.0~bionic_all.deb

wget http://download.cloudstack.org/ubuntu/dists/bionic/4.12/pool/cloudstack-management_4.12.0.0~bionic_all.deb

wget http://download.cloudstack.org/ubuntu/dists/bionic/4.12/pool/cloudstack-marvin_4.12.0.0~bionic_all.deb

wget http://download.cloudstack.org/ubuntu/dists/bionic/4.12/pool/cloudstack-usage_4.12.0.0~bionic_all.deb
After downloading these packages, we can install them by executing the following command in the terminal:
sudo dpkg -i cloudstack-agent*.deb
Now in the case of CentOS 7, the packages to download are the following:
wget http://download.cloudstack.org/centos/7/4.12/cloudstack-agent-4.12.0.0-1.el7.centos.x86_64.rpm

wget http://download.cloudstack.org/centos/7/4.12/cloudstack-baremetal-agent-4.12.0.0-1.el7.centos.x86_64.rpm

wget http://download.cloudstack.org/centos/7/4.12/cloudstack-cli-4.12.0.0-1.el7.centos.x86_64.rpm

wget http://download.cloudstack.org/centos/7/4.12/cloudstack-common-4.12.0.0-1.el7.centos.x86_64.rpm

wget http://download.cloudstack.org/centos/7/4.12/cloudstack-integration-tests-4.12.0.0-1.el7.centos.x86_64.rpm

wget http://download.cloudstack.org/centos/7/4.12/cloudstack-management-4.12.0.0-1.el7.centos.x86_64.rpm

wget http://download.cloudstack.org/centos/7/4.12/cloudstack-marvin-4.12.0.0-1.el7.centos.x86_64.rpm

wget http://download.cloudstack.org/centos/7/4.12/cloudstack-usage-4.12.0.0-1.el7.centos.x86_64.rpm
After downloading these packages, we can install them by executing the following command in the terminal:
sudo rpm -i cloudstack-agent*.rpm
For other Debian or CentOS / RHEL-based distributions, you can follow the instructions provided In the following link.
But the only detail is that the new version has not yet been made available by these methods.